Showing posts with label Milani. Show all posts

Wednesday, November 21, 2012

A Pre Thanksgiving Momma Smacker!

Hello my loves, I did not desert you....my internet was out for the past week.  I could only pick up wifi on my phone and I'm not smart enough to know how to blog from my phone yet.  So I apologize, I did so many cute nail designs this past week and was so upset I couldn't share with my little nail freaks!  I did post on Instagram, so hopefully you all follow me on there. There are so many momma smacking polishes and nail art that we need to discuss, I may have to blog twice a day for awhile! 

Ok, fun stuff now...NAILS!! I did this mani a few days ago, kind of by accident but I really like how it turned out!  Have a peek then we'll chat...


The day after I did these someone on IG actually told me it was Mickey's birthday!  What a coincidence!!  Happy Belated Birthday Micks!!!
 
 
This mani started when I swatched Essie She's Pampered, which is the red I used in this design.  I put it on all my nails and said to myself, "holy balls, this polish is gorgeous and it's screaming for Mickey ears".  Not word for word but you get the drift. The accent nail is done with OPI My Boyfriend Scales Walls and Milani Black Swift.  This is one of the cutest designs I have ever done but it looks so time consuming right?  I did my regular old dots on 3 of the 4 fingers.  On the accent nail I put on 2 coats of MBSW and let that dry.  I then added a few large dots with Black Swift.  Before the dots dried, I took my medium dotter and added the ears by making 2 small dots beside each other.  See, super simple but totes adorbs.  ( I really hate myself for using that phrase but for some reason I can't erase it, don't judge me people.)
 
This was my first ever Disney or cartoon-ey nail art.  I am quite happy with how it turned out.  Anyone can do this mani, I promise it is not hard.  If you guys do try it, make sure to tag me in it!! I love seeing everyone's nail art!
 
 
One more quick thing before I peace out....The other day I got a message on Twitter from my friend Susan. 
 
Those are my nails on Orly's Official Facebook Page!!!!
 
Can you guys believe this?  Orly chose my picture to feature on their FB page!  I was/am so beyond excited and flattered.  It really is an honor to have a major brand feature my lil ol nails!   I still have a hard time believing that people are really truly interested in what I do with my nails. It really makes me so happy and inspired more than you know!
 
 
Thank you guys for sticking by me even though I ditched you all this past week.... not by choice!  I am so happy to be back in bidnizzz!! Lots of kick ass nails to come....I hope you guys have an amazing Thanksgiving.  Stuff your sweet little faces full of turkey!
 
 
Happy Polishing and Happy Turkey Day!!!


Wednesday, October 17, 2012

Classicly Dot!!

Hi Dot Fan Club, how are you all today?  I am tired and ready to take my heiney to bed! (After American Horror Story!!!)  But not before I grace you all with my presence and a mani I did that I happen to really really love!!

Last night I was having one of those nights where no polish looked right, nothing was going on right, none of my nail art was cooperating, ughhh so frustrating!  Enter Dot with a solution to the problem.  I think I was trying to do too much.  Once I put away all the fancy polishes and realized this, things went just swimmingly.


I'm trying out different watermarks, which of the 2 do you guys like?
 
 
Isn't it just classic and clean looking?  I got so many compliments on this mani today, more than I have received in a long while!  The accent nail really pops against the pretty Tiffany Blue.  So simple, but so life altering. (ok, maybe not life altering, but certainly life improving!!)
 
I used China Glaze For Audrey for my main color.  I know I say this about a LOT of colors, but this one really is so good!  It's bright, it's crisp, it's definitely in my pile of favorites.  For the accent nail, I (Dot) used, my old faithfuls, Milani High Speed Fast Dry in Black Swift and White on the Spot.  These 2 polishes are so smack you mammy great that I just can't stop using them.  I also can't stop smacking my poor mother, but that is for another day.
 
What do you dolls think?  I really am happy with this one after all of the crappy luck I had last night.  You will certainly be seeing this same exact mani on these fingers many more times!!
 
Happy Polishing Nail Freaks!!


Wednesday, October 10, 2012

Mish Mash Mani aka The Taxicab

Hi loves, how are my peeps?  I realized today driving home from work (at 5:30) that it was already getting dark.....eeek, I want summer back.  I despise winter.  Love Christmas, hate winter.  I hear people in PA say they can't imagine celebrating Christmas in the heat....well, I could.  I can see me and Dot on the beach, sipping an egg nog daiquiri while my hubby did the Christmas shopping.  Yeah THAT'S definitely a dream!

Oh how I digress....the nails, the nails, yes that's why we are here.  So last night when I sat my fine self down to do my nails, I was drawing a bit of a blank.  I knew I wanted to do a mish mash mani (a little bit of everything) but I had no idea what.  Then I remembered that the lovely little Radha from The Polish Owl had sent me Humble Bee by Nail Venturous a few weeks ago and I hadn't tried it yet.  And so this mani was born!


See taxicab nails right?  I know they're a little cray cray (yep, still my favorite word, well technically words, but yeah, um word) but I really love them!  Isn't it nice when a mani turns out better than you thought it would? 
 
The black polish I used for my middle and pinky finger is Milani Black Swift. You guys know I love these Milani High Speed Fast Dry polishes.  This is one coat!!!  It is so good!! It's super shiny and a one coater.  Yeah, I'll definitely sign on the dotted line. On my middle finger I (Dot) slapped on a few white dots with Milani White on the Spot. I tried to keep Dot out of this one but the heffer overpowered me.  She is stronger than she looks, especially when being threatened with a dot free mani.  On my pinky I did a few fun little lines in different directions that just kind of happened.  I didn't want to do more dots, *gasp* and this is what came out when I grabbed my tiny little art brush.  Kinda tribal no?
 
On my ring finger and thumb I have 2 coats of China Glaze Sunshine Pop.  I'm not a yellow girl, but I do love me some Pop!  It's not a streaky blotchy mess like most yellows and look how bright it is!  I do feel like I should be on stage with a half shaved mohawk and bright red lips rocking out ala Pink or Gwen Stefani.  On top of that I have one coat of Lush Laquer Salt N Peppa, quite possibly my favorite glitter in the history of glitters.  It is so versatile and I can't seem to stop using it. I immediately feel super cool when I have it on.  It's totally bad ass!


On my ring finger I have the beautiful Humble Bee.  I am so excited to own this polish!  I was afraid the formula would suck and I would be very disappointed.  Just the opposite!  It went on like a dream and I am head over heels in love.  I never thought I would say that about a black and yellow polish but alas I am a changed woman!  I did wait about 5 minutes in between coats just to be sure there would be no clumping or pulling, and this did the trick!  All pics are 3 coats of HB with 2 coats of Seche Vite.   


Do you guys like this one?  Will you not try this for fear of getting the insatiable urge to drive a cab?  Fear not friends, I still have this mani on as I type and I haven't tried to pick up any strangers, although there was an incident involving Dot and a bread truck driver but that is totally unrelated and for another day. 
 
Humble Bee is sold by Ninja Polish.  It is tough to get but you can get onto an email list to be notified when it is available. Salt n Pepa can be purchased from Lush Lacquer in their Etsy store.  They have many other drool worthy glitter polishes that you must see!!
 
Also be sure to check out my friend Radha at The Polish Owl.  She rocks!!
 
 
Happy Polishing loves....oh and don't forget to tip your driver!


Sunday, October 7, 2012

Polish Us Pink Guest Blogger- A Lacquered Affair!!!

I am so so excited for tonight's post!  My good friend Lauretta from A Lacquered Affair is here tonight.  If you haven't seen Lauretta's blog yet, you must check it out.  She is such a sweet talented chicklet and her blog is wonderful!  I am so happy to call her a friend even though we are world's apart.  We have done something a little different for this guest spot.  You will see what I mean in a few minutes.  I have to give credit where it is due.  I had little to nothing to do with this mani, Laur created the design and thought up the idea, I'm basically just here to look pretty.

Without further ado...the lovely and talented Lauretta!!

A hearty "HELLO" to all readers and followers of Young Wild and Polished!  I'm extremely honored and excited to be invited by the talented Nicole to contribute my first ever guest post on her lovely blog.  I met Nicole through Twitter and her infectious crazy bubbly personality over the months had led to this collaboration.  I blog on A Lacquered Affair and am based in a tiny little tropical island named Singapore.

This post is somewhat unique.  We are both participating in Breast Cancer Awareness 2012: Polish Us Pink, organized by The Subtle Shimmer.  It is a collaboration between a group of nail bloggers (or enthusiasts on Instagram and Twitter) to post a pink manicure every Monday of the month in October. 


This topic is close to both our hearts, especially so for Nicole.  Through this collaboration, I came to know that her friend has breast cancer and is recently hospitalized.  And Nicole herself has had a personal brush with the disease.  I've witnessed a friend's mother lose her battle with breast cancer last year.  So, all of us have banded together for a very good cause, in hope of spreading the awareness. 
 
I tend to ramble.
 
My first pink manicure for #Polish Us Pink (the hashtag for Twitter and Instagram) features 2 contrasting pink polishes; a-england Iseult, a "delicate romantic pink with opalescent pearly reflection" and China Glaze Pom Pom, a medium dense mix of fine and small mauve pink glitter in a translucent pink base.
 
For the base, I used 3 coats of a-england Iseult, sans base or top coat:
 
 
Indoors, daylight
 
Using a bubblegum-pink acrylic paint, I painted on the pink ribbon, a symbol for the cause:
 
 
Outdoors, daylight
 
 
You may be wondering why it doesn't look exactly like the pink ribbon in the BCA logo.  Do read on.
 
To add some dazzle, I layered 2 coats of China Glaze Pom Po over the acrylic paint:


Here's another look at it outdoors, in the daylight:


The mani was finished with 1 coat of Cult Nails Wicked Fast top Topcoat.  I've always found freehand nail art daunting, but I thoroughly enjoyed this mani.  Please continue reading for the mystery of the other half of the pink ribbon.  We'll get there pretty soon!
 
For those who would like to have information on breast cancer and related topics, Nicole will list the revelant organisations in the USA.  I have similar information up on my blog for those residing in Singapore.
 
It's been a great pleasure guest-posting on Young Wild and Polished.  Have a great start to the new week, lovelies!
 
Toodles,
A Lacquered Affair
 
 
 Aw, yay...thanks Laur, you are such a joy!!
 
Ok so the rest of that crazy design!!  Haha it will all make sense soon, I promise!!
 
So for my half of the mani, I started off with 2 coats of Essie Sugar Daddy, my favorite jelly pinky white color.  It does require about 4 coats but let me tell you this baby is worth every second.  It is such a classy gorgeous neutral!
 
 
Gorgeous!!!
 
Isn't she a treat?  Everyone should own this baby!!
 
 
I then drew on my design with pink acrylic paint, as the talented Lauretta did.  I forgot to take a picture of this step, so sawwy.  But it looked similar to Laur's, except not as perfect.  (hmm forgot to take a pic of the crappy step, does anyone buy this story?)
 
Finally I added some glitter...the best part!! Milani One Coat Glitter Pink Flare was my choice of poison.  It was perfect for the look I was going for!


It's all coming together now isn't it?


AND FINALLY.......DRUMROLL PLEASE......


Forget this crap...I'm tooting my own horn...TOOT TOOT...and Lauretta's horn...TOOT TOOT TOOT TOOT. We done good right?  Look how that baby matches up.  I must say her side of the ribbon is fantabulous and mine is like the little sister hoping to be as good as her much cooler older sibling.  Free hand is tricky but this one I really had a great time with!
 
Huge thanks to Lauretta for her brilliant idea and gorgeous design!! You rock girlfriend.  My first guest blogger done good!  How will I top this one?
 
Hope you guys enjoyed, I had a wonderful time with this mani and working with a great friend! 
 
 
As always, Happy Polishing Loves!!


Tuesday, September 18, 2012

CND Effects Sapphire Sparkle

Well, well well, look who is doing a post that doesn't have anything to do with a challenge.  Finally I have found time to do a regular post!  Hope you guys aren't too upset with me, the 30 day challenge has been kicking my donkey booty all over the place. 

The polish that I am showing you today is one that I received in a swap with my friend Sarah of Lacquerlicious Love.  Make sure you check her out, her blog is great and she is such a sweet girl!  I am very happy I got to do my first official swap with her!  CND (Creative Nail Design) Effects Sapphire Sparkle is a topper polish.  I'm sure there is a perfectly proper name for them but I like to call them toppers.  I received this and another similiar one that will be an upcoming blog post.  :)  I looked them both up online because I had honestly never seen this brand before other than on other people's blogs.  The Sapphire Sparkle received the better review so that is the one I chose to do first.  Have a looksie....


Indoors


Indoors


Indoors
 
I wish you could see the color shift better, it was hard to capture :(
 
 
All pictures are 2 coats of CND layered over 2 coats of what else?  Milani High Speed Fast Dry Black Swift.  I think I have called this polish a different name in previous posts.  So sorry if I have, Black Swift is her name and gorgeous glossy polish is her game.  Wow that is cheesy, even for me.  This topper is so pretty layered over darker colors, especially black.  It is a duochrome, changing from purple to turquoise, to blue and even a little pink.  The thing I really like is that it looks just as good in the shade or indoors as it does outside in the sunshine. Some polishes require sunlight to get the full effect, I actually think I like this one better indoors than out.  But really, it doesn't matter where you are, it's gorgeous!  Here are a few outside pics just so you can see both....


Sapphire Sparkle is from CND's Colour & Effects Line.  If you are a fan of toppers, this is a great one to own.  It's very pretty and the shifting of the colors is really quite strong.  I like a strong topper.  If I'm taking the time to layer that sucker over black I wanna see her shake what her mama gave her!  This baby definitely like to dance!
 
I'm excited to see how this looks over other polishes.  I post a lot of my mani's that don't make it onto here on Instagram, for anyone interested.  Same name as the blog, Young Wild and Polished.  If I do a few mani's in one day and know they all won't make it onto here, I will throw them up on IG, so look me up pretty ladies!  (and polish loving boys, I don't discriminate!)
 
Happy Polishing everyone!!

Sunday, September 16, 2012

30 Day Challenge Day 16- Tribal (aka The Killer)

Yes I know, I am a day late posting this bad boy but let me tell you, me and tribal print...we are done.  We met, we really hate each other and we have decided to never spend another second together.  I have never done tribal before, I love, love, love the look of it but because I am so OCD with my nails, I just can't do it.  If one line is not perfectly straight, or every little triangle or dot is even a millimeter off, I'm taking off the polish and starting over.  I worked on this mani for an entire day, on and off and this is all I came up with.


I know, it's very simple but it's all I could muster up after 9 rounds with The Killer.  I do like the way it looks, it's not like anything I've ever done.  I really wanted to do the traditional tribal with the lines and the different shapes and dots, but I've come to realize this will be the extent of my tribal skills.  I'm just too much of a perfectionist and not enough of a steady hand girl to get it done.
 
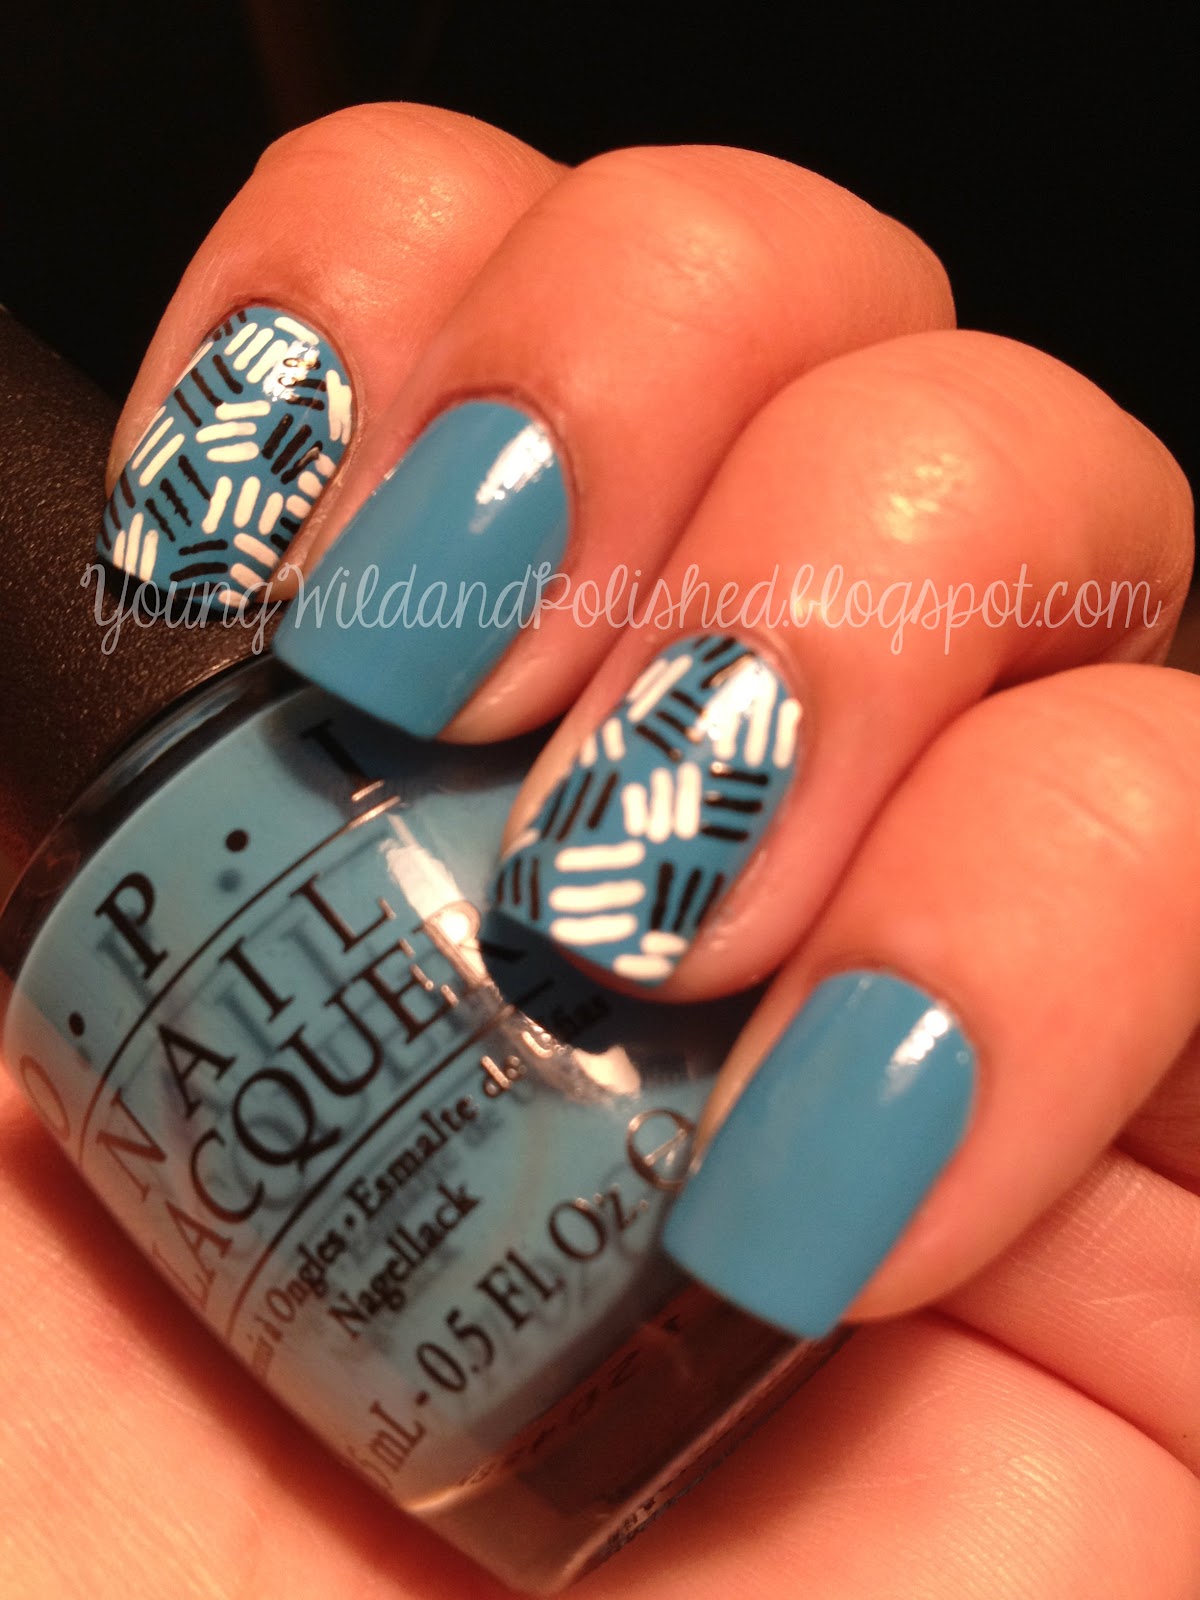
I used OPI No Room For The Blues, a gorgeous creamy deep sky blue.  I've been eyeing this color at Ulta for a while and I finally grabbed it.  Am I glad I did!  It reminds me of Zoya Robyn but it's not quite as bright which I really like! This is one of my new favorites, manicured hands down! The formula was great.  She applied like a dream and was totally opaque after 2 coats.  *Hugs OPI bottle*  I really am in love with this hot little number!  My "tribal print" if we can even call it that was done with Sinful Colors Black on Black and Milani High Speed Fast Dry White on the Spot.  You already know I love both of these!
 
Now...because I know it's the start of another work week and you all probably need a good laugh, I've decided to show you the original design I was going to post until I actually sobered up and realized just how much I disliked it.  The design could be ok....from afar....if you were blind....


So tribal day was a big fat bust for me.  Not that I think the designs are THAT awful, I just need to practice.  I don't like failing at something nail related.....can ya tell? I actually really like my design, I just really wanted to do something a little more intricate.  But at this point, I am happy I even succeeded with this one, I had a tough time with Mr. Killer!
 
Oh well, tomorrow is glitter...now that I can deal with!!
 
Happy Polishing friends!!
 
 
Check out the other sex kittens participating in the Pole Dancing World Championships, wow, um 30 Day Challenge.  *tries to get mind out of gutter but fails miserably*


Saturday, September 15, 2012

30 Day Challenge Day 15-Delicate Print. Water Marble and Tutorial

Hi guys, so tonight I have a gorgeous water marble for you.  Now normally I am pretty happy with my mani's.  This one I am thrilled with.  Please don't think I am being cocky, because I am not.  Everything just worked out really well with this one.  The polishes played nice and they spread just like mama wanted them to.  I hope you like it as much as I do.  Since I love you all so much, I will do a little tutorial after the pics since a lot of people have asked for one, and I'm just sweet like that...


Pretty huh?  It's delicate which is exactly what I was going for but it's still super fun!  I used Milani A Rose My Lady and OPI My Boyfriend Scales Walls.  I was on the fence with the Milani.  Old lady mauve or super awesome pretty mauve.  Yeah, super awesome pretty mauve.  The OPI polish I almost didn't get because I looked at it thinking I had plenty of white polish.  This is anything but a typical white polish.  It looks as if someone put one little drop of grey in a white polish, shook it up and out popped this baby.  I am IN LOVE with this color.  I always feel like white is so harsh, and this is just what I was needing.  It's white with the edge taken off, if that makes any sense.  Everyone needs this polish.  I bought 2 backups and they will most certainly get used. 
 

Ok, tutorial time...

Now this is going to be very detailed.  It's not because I think you all lick the bus windows, it's because I think it will help. I have seen tutorials in the past where they give you the basics but leave out very important details that are vital to success especially if you have tried previously and failed or are attempting something for the first time. So please don't take this as an insult.
 
Secondly, this is how I marble...that's not to say it's the best way but it's the best way I know.  I hope this helps you guys....
 
 
What you will need:
 
 
A cup...I'll give more details on this later.
2-5 Polishes...I recommend 2-3 to start.  Any more than 5...Godspeed.
1-2 bottles of ROOM TEMP water
Tape or vaseline/chapstick.  More on this later.
Small brush for cleaning cuticles
Acetone
Toothpicks
Small pair of scissors, I use the kind that come with an eyebrow grooming set.  But any small ones will work.
Tweezers or cuticle clippers.  Again, more on this in a bit.
Thick topcoat.  You all know I love me some Seche Vite.
 
Now for the fun stuff...
 
 
This is what my area looks like right now, don't laugh...I love my nail table and she loves me back!


  • Fill your cup a little more than half way with your bottled water.  I use an old won ton soup container but anything relatively small will work.  Don't use anything you are worried about getting dirty.  In other words, leave grandma's china alone. Set aside while you prep nails.  I find that this helps the water if it's not quite room temp.  Every little bit helps!
  • Paint your nails with 2 coats of white polish or something very similiar.  Some people like to use the lightest color out of the polishes they are marbling with. I don't recommend this because your marble will not be as bright.  Using white or something very close to white helps the design to look nice and bright, no matter what colors you are using for your design.
You don't have to worry about clean up now, we will do that after we marble.
 
  • Take one piece of tape and wrap it around your finger under the cuticle.  I left this one up at the edge so you could see how I applied it.
 
 
  • Put your second piece of tape the opposite way starting on one side of the nail and going up and around the inside. Some people like to use vaseline or chapstick.  I like tape but it's up to you.  I only use chapstick if I am using a color I know stains.  Tape is nice because you can see where it is and you know what area is covered.  With Vaseline or Chapstick, you are kind of blindly hoping you covered the whole finger tip. Again, your call.


Again I left it up so you could see how I did it.
 
Open all of your polishes now.  Make sure you have them close to your cup but still have room to work.  I have knocked many bottles over with a finger stuck in water.  Not fun!
     
  • Make sure your polishes are somewhat full.  If you are working with polish that is less than half way full, you will spend half of your time tilting the bottle and believe me it is a real PITA.
  • Drip 1 or 2 drops of polish into the center of your cup.  You want to be very close to the surface of the water but not touching it. If you are too far away the polish will drop to the bottom of your cup. I usually use 2 drops per color unless I am using white or a very dark color.  They will hog the design if you use too much and your finished product will be 90% of your white/dark and 10% of your other colors.


This probably wasn't the best photo to use.  Usually you will have many more circles of color.  My pink polish was being greedy and taking up all the room.  This is just something you have to figure out with trial and error depending on how well the polishes spread for you.  A normal marble would be about 10-15 circles of different colors.
 
  • Once you have reached the center of your bullseye take a toothpick and GENTLY begin to make designs in your bullseye.  I start at the outer edge and work inward, but a lot of people start at the center and work out toward the edges of the cup. Either way is fine, depending on the look you are going for.  I find it easier to make the flower petal design when you start at the outer edge and pull in toward the center.


  • Find a spot in the design that you like.  Dip your finger into that area.  You want to do it somewhat fast but not like a crazy person.  If you do it too slow you will mess up the design.  You want to do it fast enough that your finger glides into the water without really making any "waves".  Again, this is trial and error.


  • Don't touch the edges or the bottom of the cup.  BE CAREFUL! Doing the ring finger is the hardest one for me.  You can see how I have my other fingers out over the cup.  Get into a comfortable position.  If you touch any part of the cup with that nail you will be cursing and starting over. 
  • Take a q-tip and while blowing gently on the remaining polish on the surface of the water, gather up whatever is left polish wise.  Make sure you get everything because whatever is left in the water is going to end up on your nail when you pull it out.  I spin the q-tip like a crazy woman, it helps to get it up in one giant swipe.
  • Pull your finger gently and slowly out of the water once you are sure no polish is remaining on the surface.  There may be tiny bits you can't get out...just make sure they aren't in the area where you are pulling out your finger.  I always swish the water gently with a toothpick or q-tip right in front of where I am pulling out just to be sure there is no polish waiting to destroy my pretty design.

This is what you will have when you are done.
 
  • Take your scissors and cut, again GENTLY, the long area of tape on the inside of your finger.  If you applied your tape correctly, the whole upper backside of your finger will be covered with tape.  Once this is cut, take your cuticle clippers or tweezers and take your tape off.
  • Clean up your cuticles with acetone or nail polish remover and a small brush.  I use a tiny eyeliner brush.
  • Wait at least 5-10 minutes before top coating.  I usually do my entire hand before I even begin to think about top coat.  You WILL smudge your design if you do it too soon.

And here is our finished product...


I really hope this helped you guys out.  I know marbling can be really tricky.  But once you get it, it's so much fun!  If there are any things you are unsure of leave me a comment and I will do my best to answer it for you.  Again, I am no pro, I just love marbling and the above method is what works for me.
 
 
Finally....check out the other lovely ladies participating in the Dodgeball Without Breaking a Nail World Championship, um 30 Day Challenge.


Friday, September 14, 2012

30 Day Challenge Day 14-Flowers (The Little Mani That Could)

First let me apologize for being so behind in my post....I know this is coming in really late, I have been fighting with my laptop for 2 days.  I finally realized it wasn't Blogger that was the problem. (Sorry Blogger for all of the cursing and screaming I did at you, you didn't deserve it).  The problem was my stupid, idiotic craptastic computer.  I think I fixed it, and for now we are up and running.  I did have visions of me never being able to get into my blog and I pity anyone who was within 50 feet of me last night.  God bless my poor husband!

Ok I'm done bitching, let's talk nails!  So today's challenge was flowers.  You all know I am all about a good flower.  I wanted to do something a little different but that was an epic, and I'm talking super duper epic fail.  So I did what I know and love, my little dot flowers. *Dot enters the room, waves hi and struts back out, shaking what her mama gave her* 


Not too bad huh?  I just love doing these sweet little flowers and they are so simple to do!  There is a tutorial on one of my early posts.  My untried was Loreal Grecian Goddess.  It's a beautiful creamy gray color.  I love the color and the name, uh hello grecian goddess? Um, have you met me?  If you don't know, my family is 100% old school greek.  Loud, crazy...yeah greek!  Some of my family lives right in Athens and my grandparents don't speak a lick of english.  I digress, so sorry...but yeah, I loved the name of this beauty.  Formula was great, 2 coats had it totally opaque, no dragging, no spottiness, just a lovely saturated color.  The black I used is Sinful Colors Black on Black and the white is my old faithful, Milani High Speed Fast Dry White on the Spot
 
Hope you guys enjoyed the mani that almost didn't happen.  Thank God for my husband and his computer fixin brain!
 
Happy Polishing Loves!!
 
Check out the other hot mamas competing in the  Rock Climbing While Nail Arting , pardon me, 30 Day Challenge....


Thursday, September 13, 2012

30 Day Challenge Day 13--Animal Print

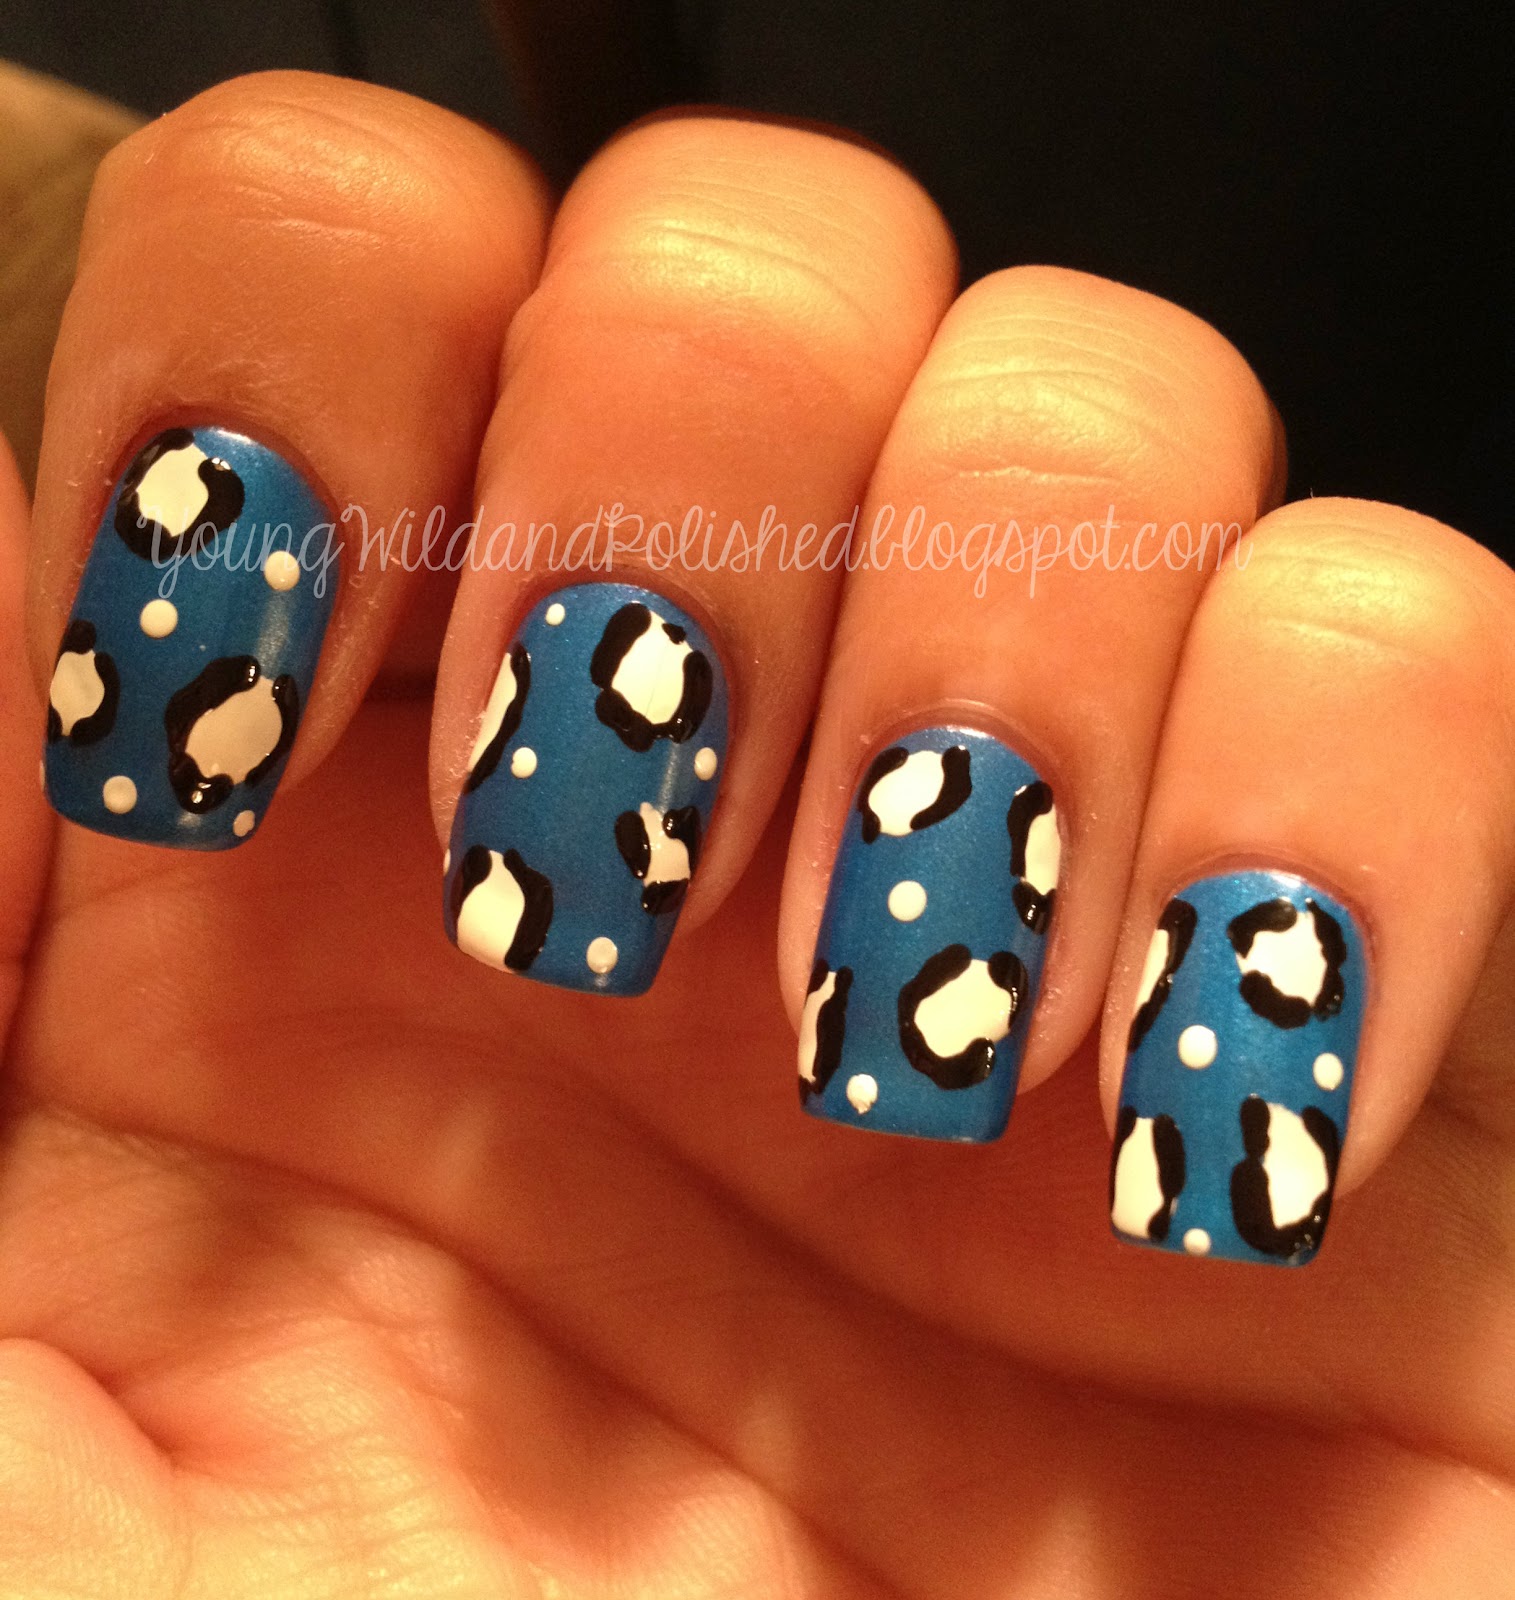
Ever have something not turn out nearly as good as you envisioned it in your head?  Yeah, welcome to my world.  I'm not really a huge fan of animal print, I mean I like it to wear in bits and pieces but whenever I imagine it on my nails, I picture Snooki and really long fan like nails.  That may look lovely on some people but it's certainly not my cup of tea.  But I had done a leopard print a while ago and it turned out really cute so I thought I'd give it another shot.  There was only one problem.....the spots were too big and we went from leopard to Bessie the cow faster than you can say moo....


Different sized pictures seems to be my thing, eh?


I'm not saying I don't like them, because I kind of do but I feel the insatiable urge to moo and have a little bite of grass whenever I look at them.  I think if I would have made the spots smaller like I did in the past I wouldn't feel so "cow-ie" (new word of the day) right now.  

I used China Glaze Splish Splash for my base color.  It's not exactly an untried, but I haven't used it in a while.  It is one of my favorite blue polishes.  The formula is not the best, it's a little spotty and requires 3 coats but the end result is very pretty!  The dots were made with Milani High Speed Fast Dry White on the Spot and Sinful Colors Black on Black.  If you haven't used this Sinful black, you should give it a try.  It really is a nice glossy black and the formula is pretty amazing for being an inexpensive drug store polish.  

I have seen some people do their outline first (the black part) and then fill in their color (the white part).  I do the opposite.  I find it easier to start by making your spots because you have a little more freedom to make them different shapes and not just straight up circles.  I just use the polish brush of whatever color I am using to make the spots.  Then I take my thinnest dotting tool, (you could use the end of a bobby pin), and I dip it into a little polish I have poured out and make my lines.  I try to leave some space in between to get the look not so uniform.  It's actually very simple.  This was a quick mani for me, I cannot get caught up with life so I apologize for not spending more time on this one.

Do you guys like this design?  I'm still on the fence with this one, maybe if I "moo" a little more it'll grow on me?!

Happy Polishing!