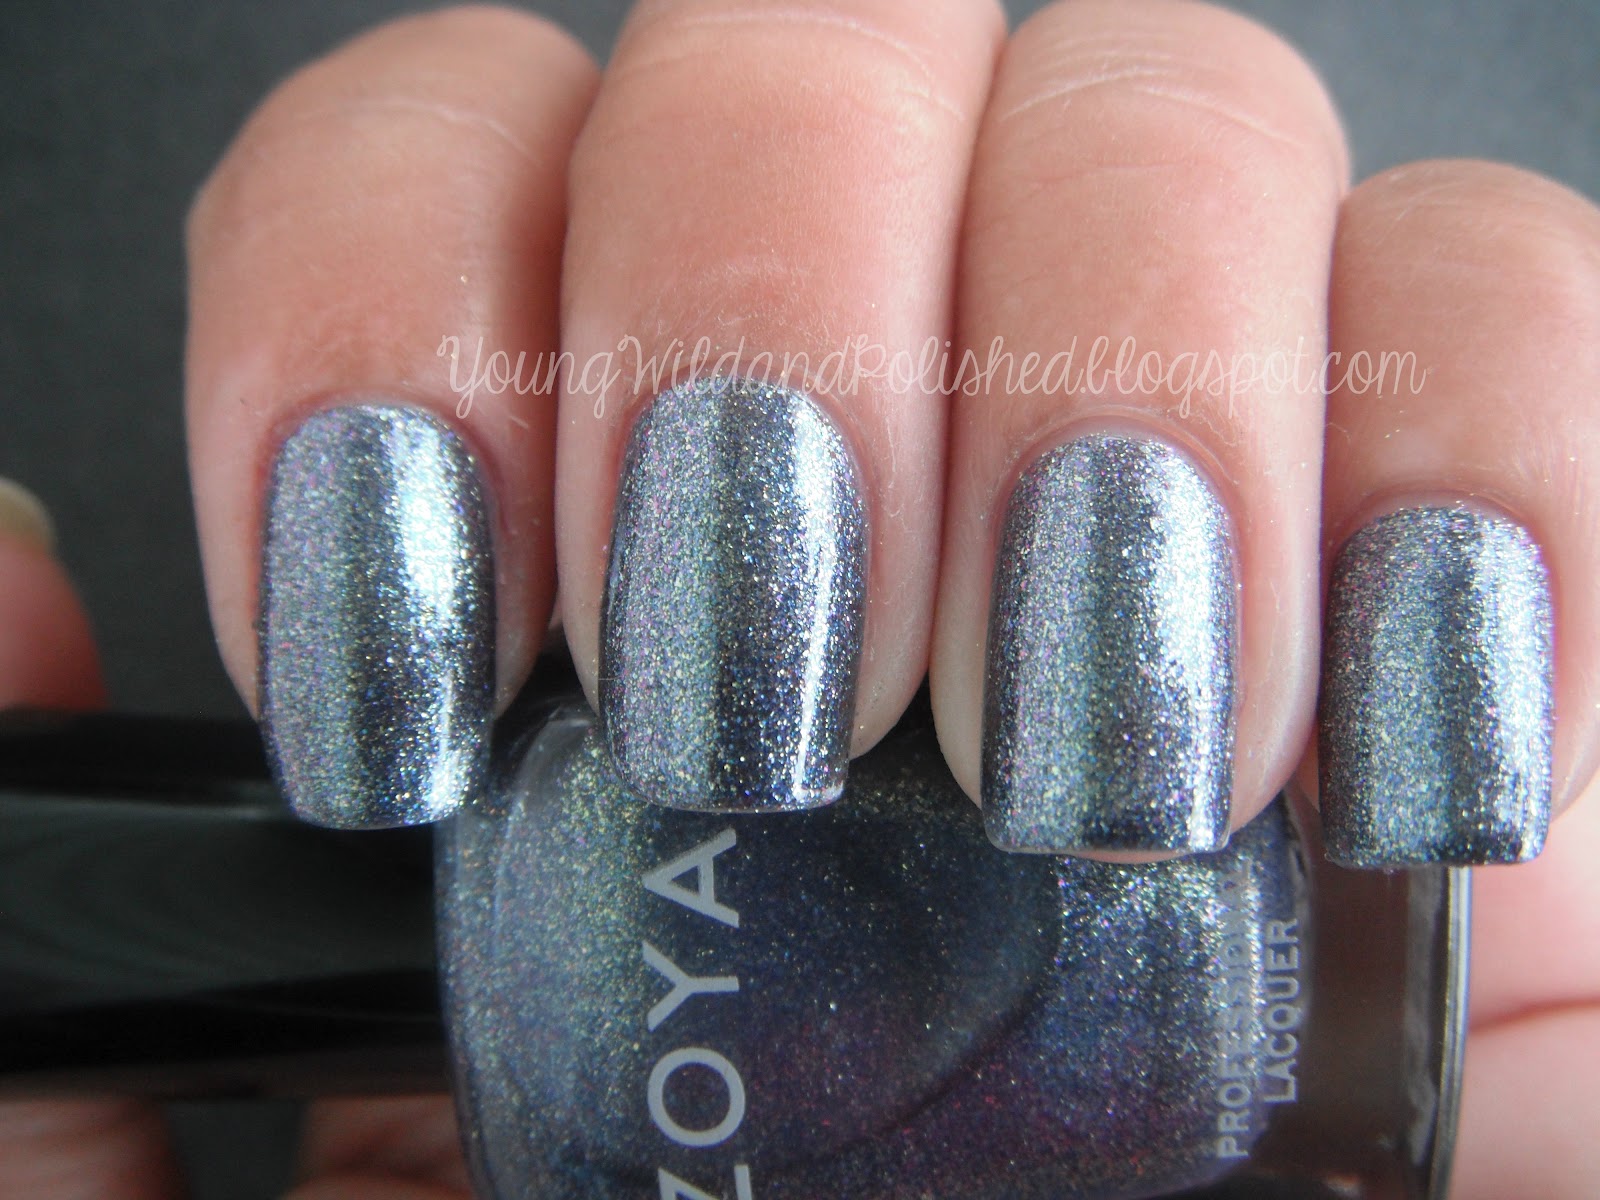
Showing posts with label Zoya. Show all posts

Monday, January 14, 2013

A Little Kitchen Sink Monday!

Hi piglets, how are we on this crap ass Monday morning? Blah, I hate Monday's!! My kids drag, I drag, people drive like poop heads....what is it about Monday's that make people act like idiots?

So anywhoo, today I have another kitchen sink mani to share with you. It didn't start off as a kitchen sinker but thats how it turned out. I actually really like it so hopefully you guys will too. If not, too bad you're stuck with me either way!

Ring finger is Essie She's Pampered with Icing Shredded glitter on top-same on thumb.
Middle finger-splatter mani done with base of OPI My Boyfriend Scales Walls. Zoya Yummy, Lime Crime Pastelchio and Layla Pure Black are my splatter colors.
Don't forget to visit me on YouTube-Youngwildandpolished. Lots of fun tutorials coming up this week!!

Happy polishing love bugs!!!

Saturday, November 24, 2012

Zoya Aurora and Storm are the Best of Friends!

As I type this I am hoping everyone survived Black Friday.  I heard a few reports of people getting beaten and trampled and I had to stop and wonder where a few of my friends were at.  I'm not above beating someone over a bottle of nail polish so I'm totes not judging.  I just find it comical that we celebrate being thankful for what we have, then we turn around and crowbar someone for a $5 toaster.  The good ol USA!!

But on to more important things....Zoya Aurora and Zoya Storm!!


Sorry the lighting made me look like an oompa loompa...but captured the polish just right, go figure!


Here are a few of my right hand...I'm trying to get her used to being in front of the camera, she is quite shy!


I love these 2 colors together so much!!!  I certainly will be inviting my mother over for a smacking session!  And this wasn't nearly as hard as it looks.  All you need is striping tape and a little patience.  I did different designs but tried to keep it somewhat uniform by matching up 2 fingers here, 2 fingers there. 
 
For those of you not "down" with striping tape, here's a brief rundown of what I did....
 
First I put on 2 coats of Aurora and topped that with a coat of Seche Vite.  You can use any fast drying top coat.  I love love love me some Seche, I never use anything else.  Here are a few shots of Aurora all by herself like a big girl!


Every time I wear Aurora I am amazed at her beauty!  She is probably, well definitely in my top 5 most sparkly, glitterly, gorgeous, easy to work with polishes.  ( I just made this category up, don't sass me people). 
 
Ok, back to the steps...Once this was dry, after about 10 minutes, I taped off my nails with my striping tape, doing one nail at a time.  Once you have your tape pressed down nice and close, especially at the cuticle area, put on a fairly thick coat of your second color, in my case Zoya Storm.  As soon as you are done applying Storm, carefully remove your tape. ( I use cuticle nippers to do this to keep my hands clean).  Repeat this for all your nails, doing only one at a time, and removing the tape as soon as you are done applying that second color.  If you wait until your second color dries, you will have really crappy looking lines, and possibly will pull half of the polish off.  We don't want to do that!
 
Wait at least 10 minutes before top coating!  If you don't you will smudge your hard work, and hell hath no fury like a smudged mani!! Put on a nice coat of Seche or your favorite topcoat and you are all done!!


Not so bad right?  If you guys decide to do this please tag me in your pics!  This is a really fun way to use these 2 beauties together!  And they certainly play well with each other!  I was really pleased with the end result!  I received so many compliments on these yesterday at work and at the store.  I swear I had to dodge a few public smackings from total strangers.  The nerve of people I tell ya!!
 
Have a good weekend kiddos, and as always, Happy Polishing!!


Sunday, October 14, 2012

My First Black and Tan Water Marble...a Success!!

Hi loves, I feel like I haven't talked to you all in forever.  Why must life be so darn crazy?  I have so much swatching to do, and all I want to do is nail art....and marbling.....and dotting (of course).  Oh speaking of dots, do you like the changes I made to my blog?  If you haven't figured this out, I am very computer illiterate, like very, and the fact that I did that all by myself had me once again tooting my own hort! (And Dot's horn, she inspired the dots, the crazy old heffer).

So lately I have really been into dark vampy water marbles.  I usually find myself using bright colors or pinks, blue, whatever...but I rarely use black, unless it is used as a teeny tiny little accent.  But all I want to do these days is marble with black.  Thinking back on my previous marbles, I realized I never did a black and tan one and it sounded quite lovely...have a goosey gander...


For this little lady I used Zoya Cho, a very pretty shimmery tan.  If you are in the market for a pretty neutral color, this would be great.  I used this as my base under this marble, and I almost didn't want to cover it, it was so beautiful!!
 
 
It's hard to see the shimmer in this pic, but I promise you, it is there!!
 
 
The second color I used was Essie Licorice, my go to black polish when I am marbling.  It always spreads well and works well with other brands.  Sometimes with WM, if you mix brands, they won't play nice together. (Sounds like Dot, she is such a hot mess). They almost just freeze up and refuse to make that bullseye that we so badly need when marbling.  Essie Licorice is a team player!!
 
I love how this looks as if I used 3 or more colors when I only used the tan and the black.  That's the beauty of water marbling, you can create such different unique looks with something as simple as black and tan polish. 
 
By the way, I made a tab on the home page of my blog for the water marble tutorial that I did a while back.  I had loads of people asking me for it, so I figured it would just be best to give it a place to call home.  Be sure to check it out if you need help with marbling.  A few friends have told me that it really helped them, which makes me so so happy!!! The more marblers in this world, the better!!
 
Happy Polishing friends!!!


Thursday, September 20, 2012

30 Day Challenge Day 20 Water Marble Wilderness Marble!!

Hi loves, this is gonna be a quick one because I want to get this posted before midnight so I can have it show up for the challenge on the host blog.  Anyway, what a night....I locked myself out of the house...had to wait for about, hmmm, 2 hours for Tony to get here with the keys to let me in.  So what's a girl to do you say? Well there were bottles of water on the porch (we always keep an extra case on the porch cause they all don't fit in the fridge).  I had a bowl sitting out there that the kids had used for something and I had a few polishes in my bag, because I ALWAYS have polish with me.  You see where this is going don't you?  Yes, I managed to gather up enough things to water marble my nails on my back porch while waiting to be let into my house.  Dedication some may say, insanity other may think? I don't give a flying squirrel, I got my marble done and that's all that matter.  And I did this sheet on a back porch with 2 kids crawling up my butt....


Not bad huh?  Sorry I did not use any untrieds, I didn't have any with me but I hope I won't be crucified for that.  I DID A WATER MARBLE WITH BASICALLY TWIGS AND A CAT'S WATER DISH, work with me here people.  I used Zoya Lara, Zoya Shelby and Essie Licorice.  I used the same crusty toothpick and q tip the whole way through, what a mess it was.  Thank God no one was taping me, I must have looked like a crazy person.  (Pipe down people, no comments from the peanut gallery).  The dots were done with the bobby pin I wore in my hair to work today, not my best but Dot really wanted to be involved in the "Wilderness Water Marble".

Hope it was worth it, what do you guys think?


Check out these other lovely ladies competing in the Wilderness Water Marble to Prove You're a Real Nail Artist Battle, um, not too far fetched....30 Day Challenge.

Tuesday, September 11, 2012

30 Day Challenge Day 11- Stripes *Sigh* And A Baby Tutorial

Hi kiddos, how is everyone doing today?  I'm ready to take my little heiney to bed but not before I get my post up for all you lacquer lovers to see.  I had a busy day today, got to reconnect with a friend I had lost contact with for a while. (Long story)  Let's just say it was a very good night!

Sooooo, stripes huh?  Yeah, not a fan!  I don't have striping tape and I don't want to play with stripes.  But the challenge was a way for me to spread my polished wings and venture into lands other than dots and water marbling.  So instead of glamouring you all into believing we had skipped over day 11 due to technical difficulties, I sucked it up and tried something new.  Originally I attempted zebra stripes but when the hubs asked me why I was scribbling on my nails, I chucked it and started over.  *Hides behind couch*  Oh ok, go ahead, have a look....


Why is your last picture so large Nicole you ask?  I have no clue...I redid it 3 times and the little mother sucker just wants to be large and in charge.  Of course I had to throw a few dots in...mainly because I jacked my middle finger up royally and didn't have it in me to redo it.  If you've never seen this design before, let me explain what I did.  Keep in mind, it's a major pain in the arse!

First I dripped about 4 or 5 large, and I mean schmongo (new word of the day) drops onto my little palette.  You could use a plate, tin foil, your husbands belly button, whatever floats your boat.  Then I sat there like a total loser and mixed the little effin puddle for what seemed like an hour (it was probably about 5 minutes) until it got gummy and started to make strings when I pulled on it.  I used my thinnest dotter to do the mixing.  I then got my nail as close as I could to said puddle and quickly but gently pulled up on my dotter bringing a string of gummy polish over my nail.  

As you can see, sometimes it didn't work as well as I had hoped.  Either the strings disappeared into thin air or they were a little too thick.  It's a cool process and really very simple but it is a little tricky to get your polish and pulling process just right.  With some practice, this could be really neat.  The trick is not to get too much polish on the dotter as you are pulling.  This is easier said than done.  Once the polish starts to thicken, it magically starts to disappear.  Your nice big puddle turns into a little spot of frustration.  I'm going to try this again and I'll take pics as I go.  It's a little difficult to explain without being able to show you kids some photos.  

You have to let this dry forever before top coating.  I didn't wait as long as I should have even though I thought I was ok.  We'll try again soon with a mini tutorial.  

My untried polish was Butter London Marrow, a deep purple with just a hint of shimmer.  Application was good, I did have a little dragging and spotting but the color is so pretty I didn't even care.  The pretty pinky purple polish I used was Zoya Perrie.  I love this polish.  It is very opaque and goes on great.  I used 2 coats of both polishes.  

Hope you guys aren't too disappointed with this one, stripes make me want to scream.  Can't we just get to water marbling already? :) 

Happy Polishing Friends!!

Check out the other lovely lacquer heads participating in the Polish Pit of Death, um, 30 Day Challenge.


Wednesday, September 5, 2012

30 Day Challenge Day 5 Blue

Hi loves, how is everyone today? I apologize for being so late with this post.  I wanted to get it posted last night before bed but....life happened so here I am at 6 in the evening finally getting it done.  Hope it was worth the wait!


I knew immediately what color I wanted to use for "blue day".  I got this gorgeous Maybelline Color Show Styled Out a few weeks ago but never got around to swatching it, other than trying it out on one finger.  It looks just like sparkly blue jeans!  Have a peeky poo....


Isn't it just the perfect color?  Formula on this little beauty was perfection.  I could have gotten away with one coat and it would have been totally fine.  Full coverage, no pulling, no spottiness, nothing.  I did 2 just to make it a little darker.  It would have been perfectly fine on its own but you know me, gotta add a little somethin somethin.  So I dotted some cute little flowers on my tips using Milani High Speed Fast Dry White on the Spot.  The centers of the flowers are done with Zoya Shelby, one of my most loved pink polishes.  


I loved this mani so much I did both hands!  


I received some many compliments on this today at work!  The girls I work with really loved it.  (Something tells me I will be doing this mani on a few friends very soon).  


What do you guys think?  How is the 30 day challenge working out for everyone?  I'm loving it so far, looking forward to the nail art portion of it!!  I will need to broaden my horizons though and get out of my comfort zone.  But that's what this is all about right?

Happy Polishing Friends!!

Check out the talented beauties participating in the Worlds Hottest Nail Blogger, oops I mean 30 Day Challenge along with me. Hehe


Tuesday, August 28, 2012

Zoya Daul and FeiFei Swatch and Review

Hello loves, hope everyone is getting through this hectic week.  My 3 little cherubs went back to school and I've come to realize that I despise this week every year.  My house is crazy right now between getting kids to bed at 9 instead of 1 am and waking at 6 instead of, sadly, noon.  Needless to say, I have 3 miserable little people under my roof.


Anywhoo, back to what we are all here for, pretty, sparkly, smack your gram mammy nails!!  I saw the new Zoya Fall Collection last time I was at Ulta and I was kind of on the fence.  A few of them were shiny and caught my eye but a few also were a little eehh.  But I sucked it up and bought a few.  I did it for you guys, let's just go with that.  You all twisted my arm and made me buy them so that I could show them to you, that sounds about right to me.  I have my 2 favorite ones for you today.  The other few I bought (which we will keep a surprise), I will show you in an upcoming post.


First up we have Daul, a super gorgeous glass flecked polish that I would literally sell my children for.....


I don't even know what color to call this.  She has a red tone to her but the base is definitely purple. There is certainly gold in there as you can easily see.  Trust me, these pics don't do this amazing polish any justice.  In the sunlight it was shimmering and sparkling like crazy.  Application was very good.  The first coat was pretty sheer but built up nicely.  I did 3 coats, I probably could have gotten away with 2 but she was a little spotty.  Perfection after 3!  Here's one more pic because I just couldn't get enough....


Next we have FeiFei, an equally gorgeous polish.  The base on this lovely lady is a medium to dark blue with gold and pink running all through it.  I have never seen a polish quite like this.  It almost looked like a glitter polish, it was so sparkly!!


I tried to get the gold and pink shimmer but I just couldn't get it to come through in the photos.  Application on this one was great and again, I did 3 coats to cover up a little bit of spottiness left from the first 2 coats, but nothing major.  This polish is a dream!!


These 2 are certainly my favorites from the fall collection.  The shimmer and shine that they have in their teeny tiny bottles is just awesome!!

Hope you kids enjoyed.  I will have the rest of my Zoya haul in an upcoming post. 


And as always.....Happy Polishing!!


Monday, August 20, 2012

Rainbow Polka Dots and a kinda sorta tutorial.

Did everyone survive Monday?  Here in PA it is rainy and cold, what is up with this weather?  I want summer back!  It's hard to believe my kids are heading back to school next week.  And....I am officially old....one going into 11th grade, one heading to middle school and only one little guy left in the elementary school.  Needless to say I'll be a wreck come Monday.


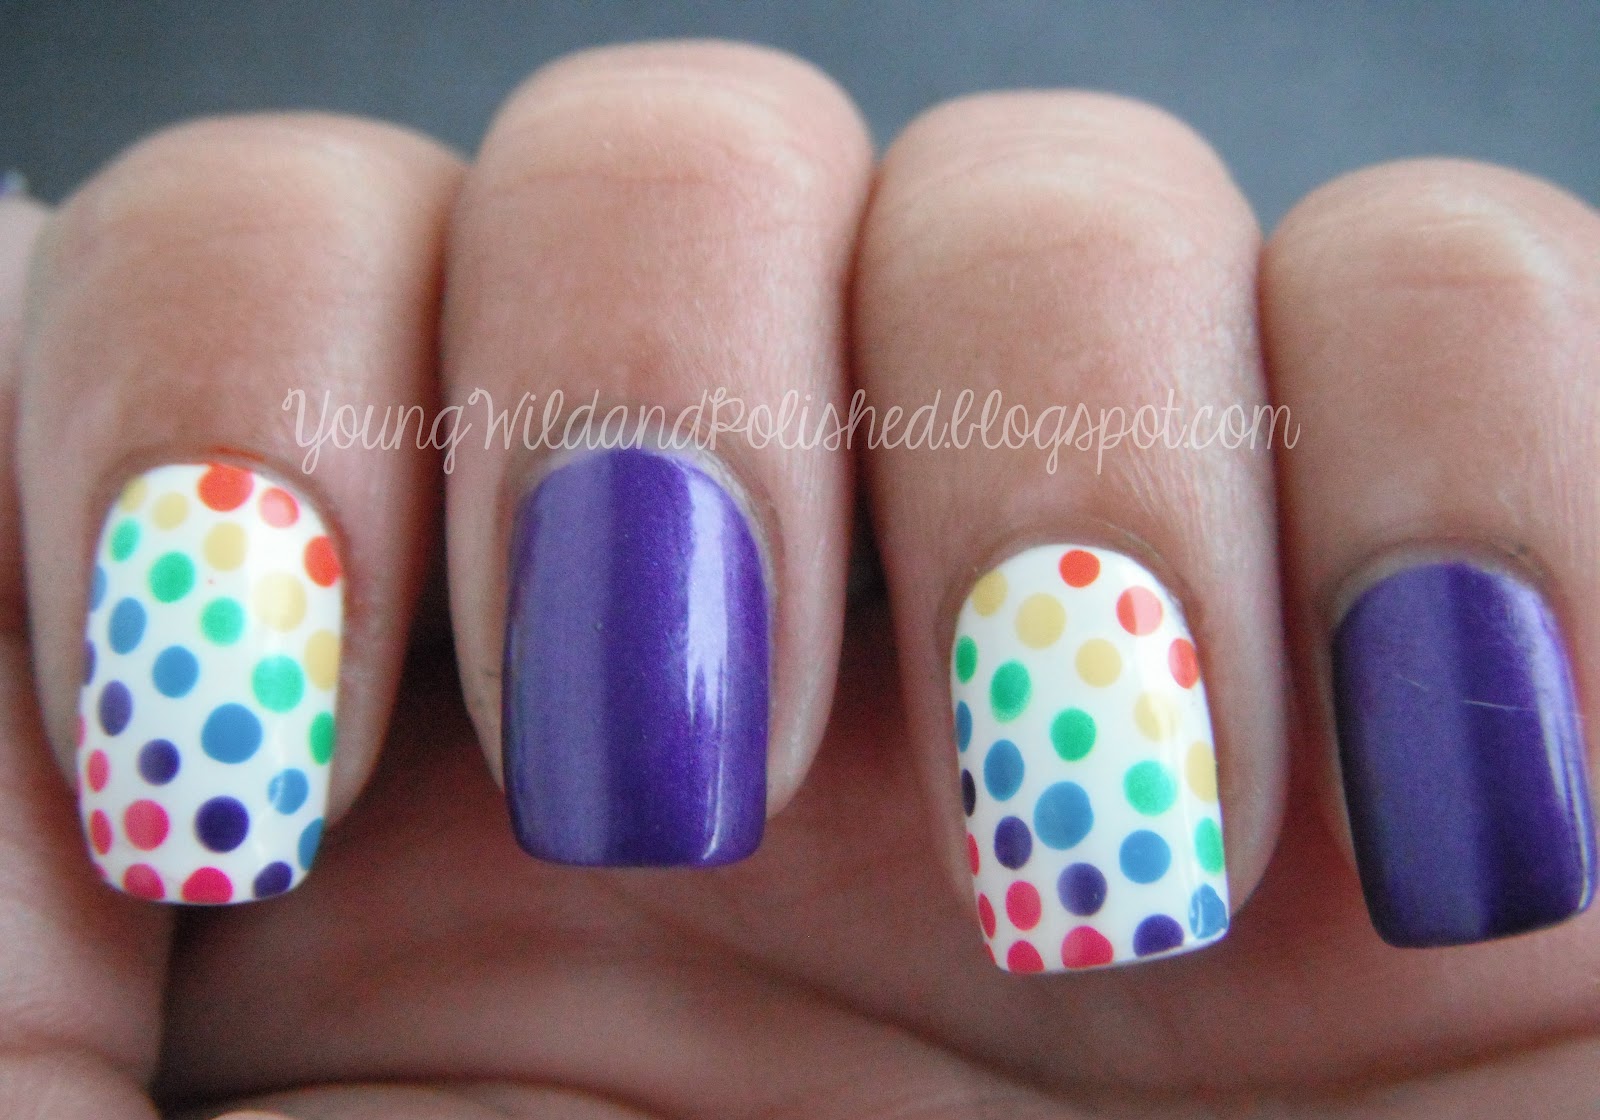
But that's not why we're here is it? Nails, yes let's talk nails!  I've been wanting to try rainbow dots for a while, but I was a little afraid.  They looked really tricky and I just knew I would jack them up. They actually are really simple and they make a big statement!


Aren't they just the sweetest thing?  Emma (my little polish princess in training) thought they were just the coolest thing.  

The purple color I used is Pixi Amazing Amethyst.  Target is the only place I have ever found Pixi and I am such a fan!  The formula is really nice and they are super opaque.  The dots were done with (in order from tip to cuticle) :

Sally Hansen Fuchsia Power
Pixi Amazing Amethyst
Zoya Robyn
China Glaze In the Limelight
Orly Spark 
Essie Orange It's Obvious

The white I used is Milani High Speed Dry White on the Spot.  I tried this on a whim because they were on sale at CVS the other day and I am totally in love. This is the greatest white polish I have ever used. It dries really quickly and doesn't get streaky and spotty like most white polishes   do. I highly recommend you get this if you need a good white polish. Heck I recommend this either way, because honestly, who can't use a great white?!

A few people have commented on my dots and how much they enjoy them.  (Thank you, thank you a thousand times over, I am blushing).  They also asked me how I get the dots to be so uniform, so I thought I'd give you all a few tips that hopefully will help you in the "dotting process".    Believe me, dots are tricky at first, you always get that one dot that just won't go right and ruins the whole look of the nail. (At least to me, hello let me introduce you to my friend OCD).  Ok, here we go...


  • Make sure that your base polish is dry.  It honestly does make a difference.  I find when the polish is tacky, the dots go on squishy.  (Yes these are professional terms in case you are wondering, hehe).  
  • Do one nail at a time.  What I mean by this is...put just enough polish out on your nail plate for one nail.  The fresher and wetter the polish the better.  I used to try to do 3 nails or more with one glob of polish and once that glob starts to dry...hello trouble.  You will get the little flyaways that leave little lines of tacky polish all over your nail if you try to overdo it.
  • Clean your dotter after each nail.  Dip it in acetone and wipe with a paper towel or whatever you have on hand.  Just make sure that you don't leave any lint on whatever tool you are using to dot.  Not cleaning the dotter and letting the polish build up is what causes different sized dots.  With the build up your dotter will hold more polish, therefore making larger dots.  This is the most important hint of them all!  CLEAN YOUR DOTTER FREQUENTLY!!   It really does make a huge difference.  
  • Don't go crazy with the dipping.  I usually dip about half way in my little spot of polish for the initial "dip" and then for each dot after, I just barely touch the blob.  You don't want too much.  If you do get too much, your dots will start to get larger.  Clean your dotter off and start over if this happens. It is worth it in the end.  
  • For "regular" dots I usually start in the center of the nail down near the cuticle.  I make a line of 3 to 4 dots evenly spaced.  Then I do either side alternating how the dots are placed. 
  • For this rainbow mani, I started at the tip of the nail and made the dots diagonally, working my way down to the cuticle.  I made one row of dots with each color, sometimes adding an extra here or there if I had extra space I had to fill in.
This is a picture of the dotters I use, the white one is by far by favorite.  I purchased these on Amazon and they were very inexpensive.  They are one of the greatest nail art tools I own!!


And here is a picture of the size of my little "glob" that I have spoken of so much.  I put a dime by it so you can get an idea of the actual size.  This would be for one nail. Repeat for each nail with a new blob of polish AFTER you clean off your dotter. :)


Sorry for the messy plate, I have been using this same one since I was like 16.
I will never replace it!


I hope this helped those of you who needed a few tips on dotting.  I am in no way a professional dotter, lol that sounds really silly.  I'm not posting this with an "I'm so much better than you" attitude, and I hope it doesn't seem that way.  I honestly want to help you guys any way that I can. There are some forms of nail art that I absolutely stink at and there a few that I am pretty decent at.  Dots are one of my favorite things to do and if I can help anyone then I certainly will!


Also an update on the water marble video....it is done, I just suck at life when it comes to uploading, editing, all that jazz.  If I don't bust the camcorder or strangle myself, it will be up as soon as my dumb ass figures everything out. Hehe.

Wow that was a long one...Happy Polishing Friends!!!


Friday, July 27, 2012

Who doesn't love a good polka dot?

I wore these nails when I went for my outpatient procedure today and I got so many compliments. One nurse even argued with me (jokingly) that they had to be stickers. I do love me a good "doticure" every now and then. I used to use a bobby pin end, but now I use a real, grown up big girl dotter that I bought off of ebay in a set of 5. 

I used Zoya Shelby, my most favorite Barbie pink and the dots were done with China Glaze White on White. The last pic shows my pretty coneflowers in the background.  I think the only thing I love more than gardening is doing my nails!