Showing posts with label 30 day challenge. Show all posts

Saturday, September 22, 2012

30 Day Challenge Day 22 Inspired by a Song-Nicki Minaj Baby!!

Hi loves, how is everyone on this lovely saturday?  I'm rushing as usual to get posted before the midnight deadline so I will keep this short and ever so sweet!  My inspiration song is "Super Bass" by the queen herself, Nicki Minaj.  I have been known to karaoke a time or 20 to this song, I know every word and I don't care who knows it.  The song has given much embarassment to my kids as I drop them off in front of school.

When I hear this song, or sing it in my best "cat being tortured and beaten" voice, I am happy.  It's a fun song, and I have had endless fun embarassing my kids with it.  So my nails are happy, and of course bright, because duh, it's Nicki Minaj.  Have a peek...


Of course Dot wanted to come out and play, the diva bitch that she is.  But I figured I would let her since she has lended herself to some pretty cool mani's.  My untried for this one was Wet n Wild On a Trip, the pretty purple on my pinky.  The other colors I used, in order from index finger to ring finger are Sally Hansen Pretty in Hot Pink, OPI No Room For the Blues, and Essie Licorice. I used these colors for the dots on my ring finger along with China Glaze Flip Flop Fantasy. I had FFF on my thumb but messed it up, so that was a big fat fail. 
 
Alright kids, hope you enjoyed this one....if you ever are interested I can perform Super Bass for any of you for a small fee.  Dot and I would love to do a duet together. 
 
Happy Polishing hot mamas!!
 
 
Check out the other singers competing in the How Low Can you Go without Splitting your Pants Semifinals,  that would be interesting but.....30 Day Challenge.

Friday, September 21, 2012

30 Day Challenge Day 21-Inspired By a Color

So I'm still not sure if "inspired by a color" means a nail polish specifically or just color in general, so I'll put my little twist on it, as I always do and hope it works out.  I didn't have to think about this one for long.  As soon as I heard the word inspiration, I only thought of one thing.  Allow me to explain....My sister in law Cary passed away 2 years ago at the age of 34 from a nasty form of Leukemia.  I won't go crazy into detail, because after all we are here to discuss nails but I will give you a little...She was my husband's only sibling and they were very close.  She fought like hell, always with a positive outlook, even at the very end.  I miss her like crazy but I know she is up there laughing her infectious laugh and making everyone around her better just for getting to be in her presence.

My inspiration color is orange....that is the color for leukemia awareness.  Cary's favorite color was purple so I combined the 2 and this is what I came up with....


My whole mani was basically untrieds.  The purple I used is China Glaze Grape Juice.  I've had the color forever and never used it.  What was I thinking?  It's gorgeous!!  The orange accent nail is done with OPI Are We There Yet. Another beaut!  I think both colors work great together!  I did a dry marble on my ring finger.  I have a mini tutorial in an earlier post.  Basically you put a thick coat of your base color, then a few tiny drops of your accent color and swirl the 2 together gently with a toothpick.  It's very simple to do, although I haven't quite mastered it yet. 


I hope you all get to, at some point, come in contact with someone as inspiring and beautiful as my sister in law was.  I am a better person for the short time I got to spend with her.

Happy Polishing lacquer lovers!!

Thursday, September 20, 2012

30 Day Challenge Day 20 Water Marble Wilderness Marble!!

Hi loves, this is gonna be a quick one because I want to get this posted before midnight so I can have it show up for the challenge on the host blog.  Anyway, what a night....I locked myself out of the house...had to wait for about, hmmm, 2 hours for Tony to get here with the keys to let me in.  So what's a girl to do you say? Well there were bottles of water on the porch (we always keep an extra case on the porch cause they all don't fit in the fridge).  I had a bowl sitting out there that the kids had used for something and I had a few polishes in my bag, because I ALWAYS have polish with me.  You see where this is going don't you?  Yes, I managed to gather up enough things to water marble my nails on my back porch while waiting to be let into my house.  Dedication some may say, insanity other may think? I don't give a flying squirrel, I got my marble done and that's all that matter.  And I did this sheet on a back porch with 2 kids crawling up my butt....


Not bad huh?  Sorry I did not use any untrieds, I didn't have any with me but I hope I won't be crucified for that.  I DID A WATER MARBLE WITH BASICALLY TWIGS AND A CAT'S WATER DISH, work with me here people.  I used Zoya Lara, Zoya Shelby and Essie Licorice.  I used the same crusty toothpick and q tip the whole way through, what a mess it was.  Thank God no one was taping me, I must have looked like a crazy person.  (Pipe down people, no comments from the peanut gallery).  The dots were done with the bobby pin I wore in my hair to work today, not my best but Dot really wanted to be involved in the "Wilderness Water Marble".

Hope it was worth it, what do you guys think?


Check out these other lovely ladies competing in the Wilderness Water Marble to Prove You're a Real Nail Artist Battle, um, not too far fetched....30 Day Challenge.

Monday, September 17, 2012

30 Day Challenge Day 18- Half Moon (Curse you)

Hi loves, another day, another mani.  I feel like I am neglecting you all because I have only been doing 30 day posts since this thing started.  I just can't seem to get a regular post done.  I have a Lieber Award post that has been drafted for days. I need more time in a day, can someone work on that for me please?

So...the dreaded half moon mani...not a fan...if it doesn't contain dots, water marbling or dot flowers this ho ain't interested.  Seriously, who is this bitch and why is she on my blog?  That's how I feel lately, I seem to be a little hornery, no not horny, hornery, you people are sick I tell you!  I feel like I don't like anything lately.  I have found in doing this challenge, if I'm not comfortable with it, I decide I don't like it.  Hey admitting you have a problem is the first step right?

I love the look of the half moon, but I suck at life whenever I even think about doing one.  I do not have a steady hand when it comes to lines.  *makes note to self to work on this problem*  So what else would I do you ask....wait for it....wait for it...*enter Dot from stage left*  What up bitches? Dot is in the hizz-ouse.  Yep you guessed it, the lovely and talented Dot helped me out on this one.  Have a look before I write a flippin book here....


She's pretty cute huh? Leave it to me to do a half moon mani with dots, but I tried I swear I did, to do a traditional half moon mani.  Then I thought to myself, "when am I ever traditional?"  And that's when Dot got here to help.  I used the new Essie Yoga Collection.  I freaking love this entire collection although we are missing Spinning Again.  I didn't even bother to buy it because it's red and me and red have broken up. The blue color on my pinky and ring finger is Boxer Shorts, my favorite of the bunch.  Formula is good, a little teeny bit spotty but 2 coats takes care of this pretty well.  The color is divine!  Reminds me of Essie Lapiz of Luxury Fall Edition.  Just a little darker and dustier.  On my index and middle finger we have Pilates Hottie, my favorite of the bunch.  Oh I know I said that already but I can't decide.  I love them all. Formula is ok on this one, it is a little chalky looking but top coat takes care of that.  I dotted with these 2 colors and I threw in Marathin from this same Yoga Collection and Miss Fancy Pants from the Stylenomics Collection. (Marathin is the pink, Fancy Pants is the tan).
 
Now this one is pretty self explanatory.  I took the colors I was planning on dotting with and just put a few drops on my trusty little nail plate.  I used my second smallest dotter to put the different colors on.  Some nails I did one set of blue, then another set of tan etc, other nails, I went back and forth, one dot blue, one dot tan, etc..depending on how the nail was turning out.  Either way works fine.  Trial and error people. 
 
I would like to give this one another shot.  I think it could be really cute with maybe pink and black?! 
 
Do you like this mani?  Are you a fan of the half moon mani?  Her and I are just getting to know each other, we will see where this relationship goes!
 
Happy Polishing hot mamas!
 
Visit my sistas participating in the Alter Ego, Speaking in 3rd person Championship of the World , wait I already won this....sheesh...30 Day Challenge...
 

30 Day Challenge Day 17- Glitter

Hi lovebugs, how was everyone's Monday? Mine sucked immensely, I'll be very happy when it is over.  Car broke down, weather sucked, just a craptastic day.  But now I'm posting and I feel much better.  Doing my nails and blogging is a very relaxing thing for me, it totally calms me down and is the perfect end to a bad day!

I must have gotten 15 bottles of glitter polish out and couldn't decide what to do.  Then I remembered that I purchased this Barielle Falling Star polish the other day and hadn't tried it yet.  It is perfect for glitter day.  Now you know Dot....she had to throw a little sumthin' sumthin' in the mix.  Have a gander...


Why is it that I always have one picture that is larger than the rest?Who knows? It's a big mystery!  Oh yes, the polish... isn't this pretty?  I really like the Barielle polish but I felt like it needed a little pop.  I did an accent nail with Essie Penny Talks and the dots are done with the same Barielle polish I used for the other nails.  You should all know by now I totally adore the Essie Chrome Collection and use it every chance I get!  I wasn't sure how Falling Star would dot with having glitter in it, but it went on just fine.  Application was a little tricky.  The first coat was fine but my second coat was a little thick and goopy.  I have heard other people had this same problem with this little blue darlin.  It really is a very unique polish.  The glitter in it is almost the exact color of Essie Penny Talks.  I definitely don't have anything like this in my very large collection.  And to think I picked this baby up at TJ Maxx for $2.99!  That's my kind of polish!
 
What do you guys think? Would you purchase this Barielle polish?  Dot is really happy with it, and if Dot is happy, everybody is happy!
 
Tune in to the other ladies competing in the Dot til you Drop Quarter Finals, uh no thats not right...30 Day Challenge.


Sunday, September 16, 2012

30 Day Challenge Day 16- Tribal (aka The Killer)

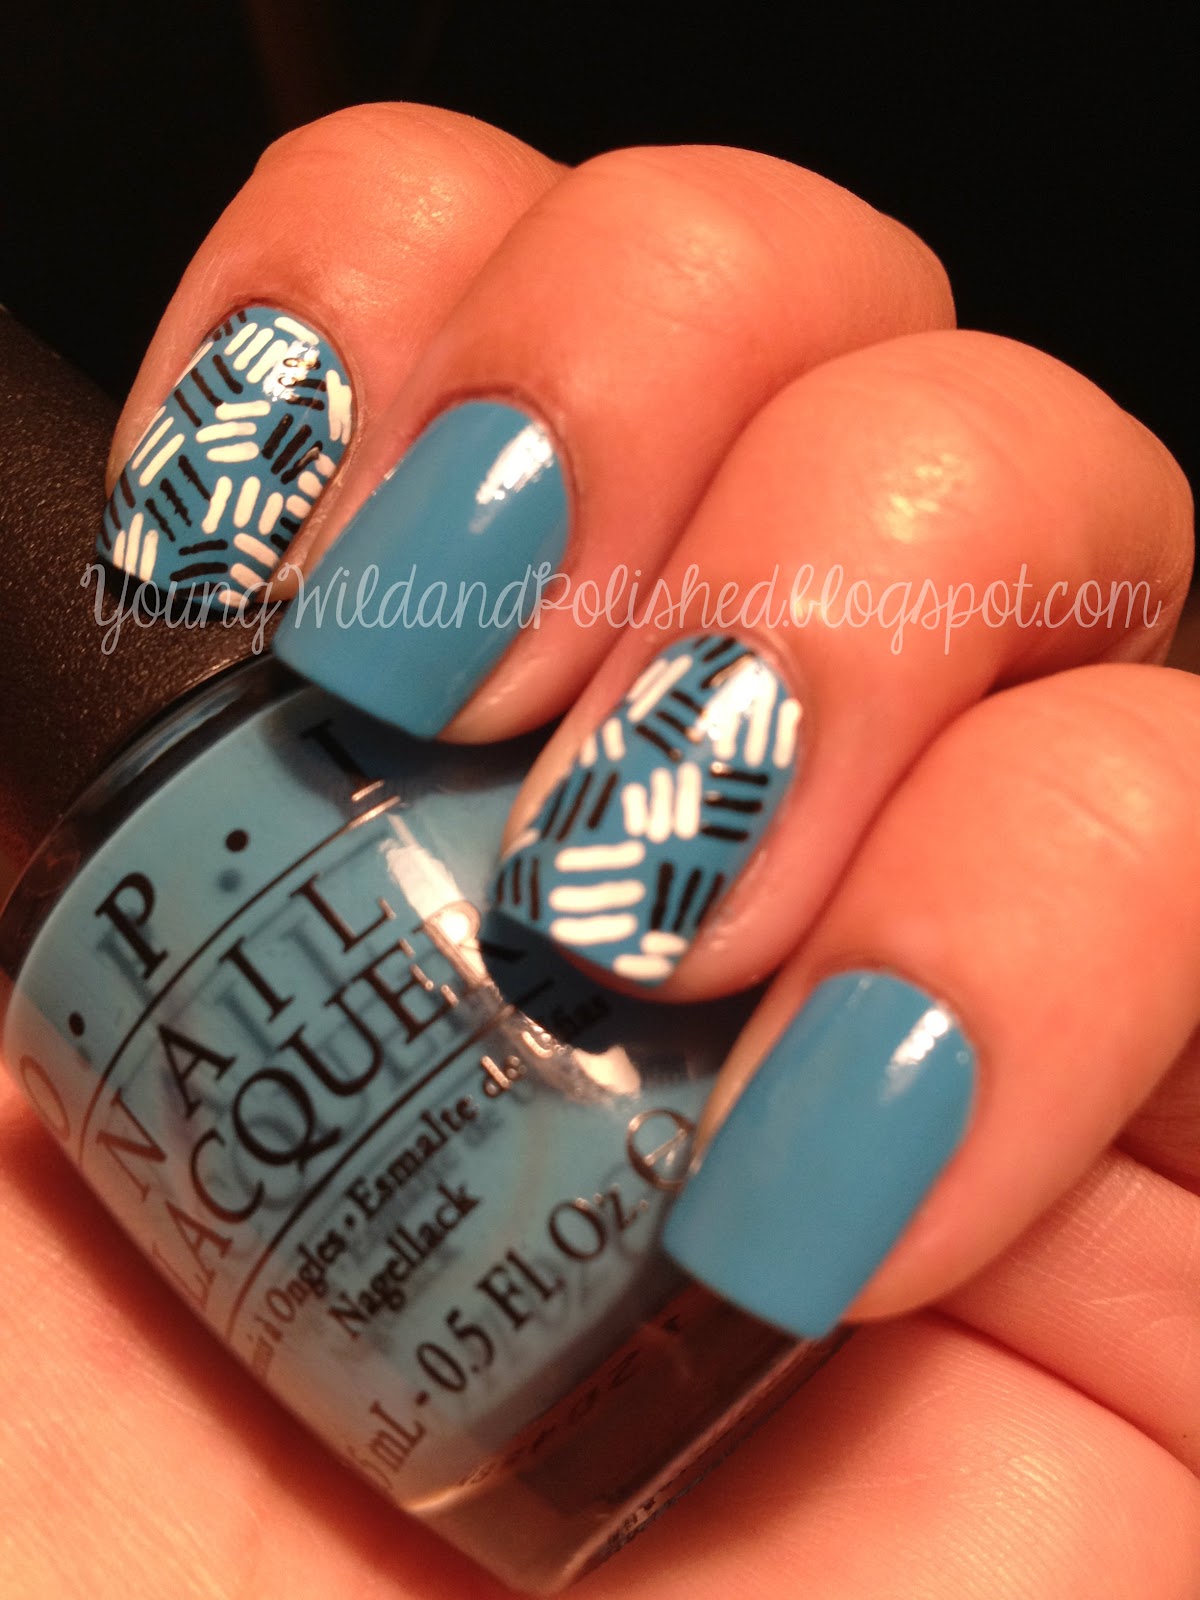
Yes I know, I am a day late posting this bad boy but let me tell you, me and tribal print...we are done.  We met, we really hate each other and we have decided to never spend another second together.  I have never done tribal before, I love, love, love the look of it but because I am so OCD with my nails, I just can't do it.  If one line is not perfectly straight, or every little triangle or dot is even a millimeter off, I'm taking off the polish and starting over.  I worked on this mani for an entire day, on and off and this is all I came up with.


I know, it's very simple but it's all I could muster up after 9 rounds with The Killer.  I do like the way it looks, it's not like anything I've ever done.  I really wanted to do the traditional tribal with the lines and the different shapes and dots, but I've come to realize this will be the extent of my tribal skills.  I'm just too much of a perfectionist and not enough of a steady hand girl to get it done.
 
I used OPI No Room For The Blues, a gorgeous creamy deep sky blue.  I've been eyeing this color at Ulta for a while and I finally grabbed it.  Am I glad I did!  It reminds me of Zoya Robyn but it's not quite as bright which I really like! This is one of my new favorites, manicured hands down! The formula was great.  She applied like a dream and was totally opaque after 2 coats.  *Hugs OPI bottle*  I really am in love with this hot little number!  My "tribal print" if we can even call it that was done with Sinful Colors Black on Black and Milani High Speed Fast Dry White on the Spot.  You already know I love both of these!
 
Now...because I know it's the start of another work week and you all probably need a good laugh, I've decided to show you the original design I was going to post until I actually sobered up and realized just how much I disliked it.  The design could be ok....from afar....if you were blind....


So tribal day was a big fat bust for me.  Not that I think the designs are THAT awful, I just need to practice.  I don't like failing at something nail related.....can ya tell? I actually really like my design, I just really wanted to do something a little more intricate.  But at this point, I am happy I even succeeded with this one, I had a tough time with Mr. Killer!
 
Oh well, tomorrow is glitter...now that I can deal with!!
 
Happy Polishing friends!!
 
 
Check out the other sex kittens participating in the Pole Dancing World Championships, wow, um 30 Day Challenge.  *tries to get mind out of gutter but fails miserably*


Saturday, September 15, 2012

30 Day Challenge Day 15-Delicate Print. Water Marble and Tutorial

Hi guys, so tonight I have a gorgeous water marble for you.  Now normally I am pretty happy with my mani's.  This one I am thrilled with.  Please don't think I am being cocky, because I am not.  Everything just worked out really well with this one.  The polishes played nice and they spread just like mama wanted them to.  I hope you like it as much as I do.  Since I love you all so much, I will do a little tutorial after the pics since a lot of people have asked for one, and I'm just sweet like that...


Pretty huh?  It's delicate which is exactly what I was going for but it's still super fun!  I used Milani A Rose My Lady and OPI My Boyfriend Scales Walls.  I was on the fence with the Milani.  Old lady mauve or super awesome pretty mauve.  Yeah, super awesome pretty mauve.  The OPI polish I almost didn't get because I looked at it thinking I had plenty of white polish.  This is anything but a typical white polish.  It looks as if someone put one little drop of grey in a white polish, shook it up and out popped this baby.  I am IN LOVE with this color.  I always feel like white is so harsh, and this is just what I was needing.  It's white with the edge taken off, if that makes any sense.  Everyone needs this polish.  I bought 2 backups and they will most certainly get used. 
 

Ok, tutorial time...

Now this is going to be very detailed.  It's not because I think you all lick the bus windows, it's because I think it will help. I have seen tutorials in the past where they give you the basics but leave out very important details that are vital to success especially if you have tried previously and failed or are attempting something for the first time. So please don't take this as an insult.
 
Secondly, this is how I marble...that's not to say it's the best way but it's the best way I know.  I hope this helps you guys....
 
 
What you will need:
 
 
A cup...I'll give more details on this later.
2-5 Polishes...I recommend 2-3 to start.  Any more than 5...Godspeed.
1-2 bottles of ROOM TEMP water
Tape or vaseline/chapstick.  More on this later.
Small brush for cleaning cuticles
Acetone
Toothpicks
Small pair of scissors, I use the kind that come with an eyebrow grooming set.  But any small ones will work.
Tweezers or cuticle clippers.  Again, more on this in a bit.
Thick topcoat.  You all know I love me some Seche Vite.
 
Now for the fun stuff...
 
 
This is what my area looks like right now, don't laugh...I love my nail table and she loves me back!


  • Fill your cup a little more than half way with your bottled water.  I use an old won ton soup container but anything relatively small will work.  Don't use anything you are worried about getting dirty.  In other words, leave grandma's china alone. Set aside while you prep nails.  I find that this helps the water if it's not quite room temp.  Every little bit helps!
  • Paint your nails with 2 coats of white polish or something very similiar.  Some people like to use the lightest color out of the polishes they are marbling with. I don't recommend this because your marble will not be as bright.  Using white or something very close to white helps the design to look nice and bright, no matter what colors you are using for your design.
You don't have to worry about clean up now, we will do that after we marble.
 
  • Take one piece of tape and wrap it around your finger under the cuticle.  I left this one up at the edge so you could see how I applied it.
 
 
  • Put your second piece of tape the opposite way starting on one side of the nail and going up and around the inside. Some people like to use vaseline or chapstick.  I like tape but it's up to you.  I only use chapstick if I am using a color I know stains.  Tape is nice because you can see where it is and you know what area is covered.  With Vaseline or Chapstick, you are kind of blindly hoping you covered the whole finger tip. Again, your call.


Again I left it up so you could see how I did it.
 
Open all of your polishes now.  Make sure you have them close to your cup but still have room to work.  I have knocked many bottles over with a finger stuck in water.  Not fun!
     
  • Make sure your polishes are somewhat full.  If you are working with polish that is less than half way full, you will spend half of your time tilting the bottle and believe me it is a real PITA.
  • Drip 1 or 2 drops of polish into the center of your cup.  You want to be very close to the surface of the water but not touching it. If you are too far away the polish will drop to the bottom of your cup. I usually use 2 drops per color unless I am using white or a very dark color.  They will hog the design if you use too much and your finished product will be 90% of your white/dark and 10% of your other colors.


This probably wasn't the best photo to use.  Usually you will have many more circles of color.  My pink polish was being greedy and taking up all the room.  This is just something you have to figure out with trial and error depending on how well the polishes spread for you.  A normal marble would be about 10-15 circles of different colors.
 
  • Once you have reached the center of your bullseye take a toothpick and GENTLY begin to make designs in your bullseye.  I start at the outer edge and work inward, but a lot of people start at the center and work out toward the edges of the cup. Either way is fine, depending on the look you are going for.  I find it easier to make the flower petal design when you start at the outer edge and pull in toward the center.


  • Find a spot in the design that you like.  Dip your finger into that area.  You want to do it somewhat fast but not like a crazy person.  If you do it too slow you will mess up the design.  You want to do it fast enough that your finger glides into the water without really making any "waves".  Again, this is trial and error.


  • Don't touch the edges or the bottom of the cup.  BE CAREFUL! Doing the ring finger is the hardest one for me.  You can see how I have my other fingers out over the cup.  Get into a comfortable position.  If you touch any part of the cup with that nail you will be cursing and starting over. 
  • Take a q-tip and while blowing gently on the remaining polish on the surface of the water, gather up whatever is left polish wise.  Make sure you get everything because whatever is left in the water is going to end up on your nail when you pull it out.  I spin the q-tip like a crazy woman, it helps to get it up in one giant swipe.
  • Pull your finger gently and slowly out of the water once you are sure no polish is remaining on the surface.  There may be tiny bits you can't get out...just make sure they aren't in the area where you are pulling out your finger.  I always swish the water gently with a toothpick or q-tip right in front of where I am pulling out just to be sure there is no polish waiting to destroy my pretty design.

This is what you will have when you are done.
 
  • Take your scissors and cut, again GENTLY, the long area of tape on the inside of your finger.  If you applied your tape correctly, the whole upper backside of your finger will be covered with tape.  Once this is cut, take your cuticle clippers or tweezers and take your tape off.
  • Clean up your cuticles with acetone or nail polish remover and a small brush.  I use a tiny eyeliner brush.
  • Wait at least 5-10 minutes before top coating.  I usually do my entire hand before I even begin to think about top coat.  You WILL smudge your design if you do it too soon.

And here is our finished product...


I really hope this helped you guys out.  I know marbling can be really tricky.  But once you get it, it's so much fun!  If there are any things you are unsure of leave me a comment and I will do my best to answer it for you.  Again, I am no pro, I just love marbling and the above method is what works for me.
 
 
Finally....check out the other lovely ladies participating in the Dodgeball Without Breaking a Nail World Championship, um 30 Day Challenge.


Friday, September 14, 2012

30 Day Challenge Day 14-Flowers (The Little Mani That Could)

First let me apologize for being so behind in my post....I know this is coming in really late, I have been fighting with my laptop for 2 days.  I finally realized it wasn't Blogger that was the problem. (Sorry Blogger for all of the cursing and screaming I did at you, you didn't deserve it).  The problem was my stupid, idiotic craptastic computer.  I think I fixed it, and for now we are up and running.  I did have visions of me never being able to get into my blog and I pity anyone who was within 50 feet of me last night.  God bless my poor husband!

Ok I'm done bitching, let's talk nails!  So today's challenge was flowers.  You all know I am all about a good flower.  I wanted to do something a little different but that was an epic, and I'm talking super duper epic fail.  So I did what I know and love, my little dot flowers. *Dot enters the room, waves hi and struts back out, shaking what her mama gave her* 


Not too bad huh?  I just love doing these sweet little flowers and they are so simple to do!  There is a tutorial on one of my early posts.  My untried was Loreal Grecian Goddess.  It's a beautiful creamy gray color.  I love the color and the name, uh hello grecian goddess? Um, have you met me?  If you don't know, my family is 100% old school greek.  Loud, crazy...yeah greek!  Some of my family lives right in Athens and my grandparents don't speak a lick of english.  I digress, so sorry...but yeah, I loved the name of this beauty.  Formula was great, 2 coats had it totally opaque, no dragging, no spottiness, just a lovely saturated color.  The black I used is Sinful Colors Black on Black and the white is my old faithful, Milani High Speed Fast Dry White on the Spot
 
Hope you guys enjoyed the mani that almost didn't happen.  Thank God for my husband and his computer fixin brain!
 
Happy Polishing Loves!!
 
Check out the other hot mamas competing in the  Rock Climbing While Nail Arting , pardon me, 30 Day Challenge....


Thursday, September 13, 2012

30 Day Challenge Day 13--Animal Print

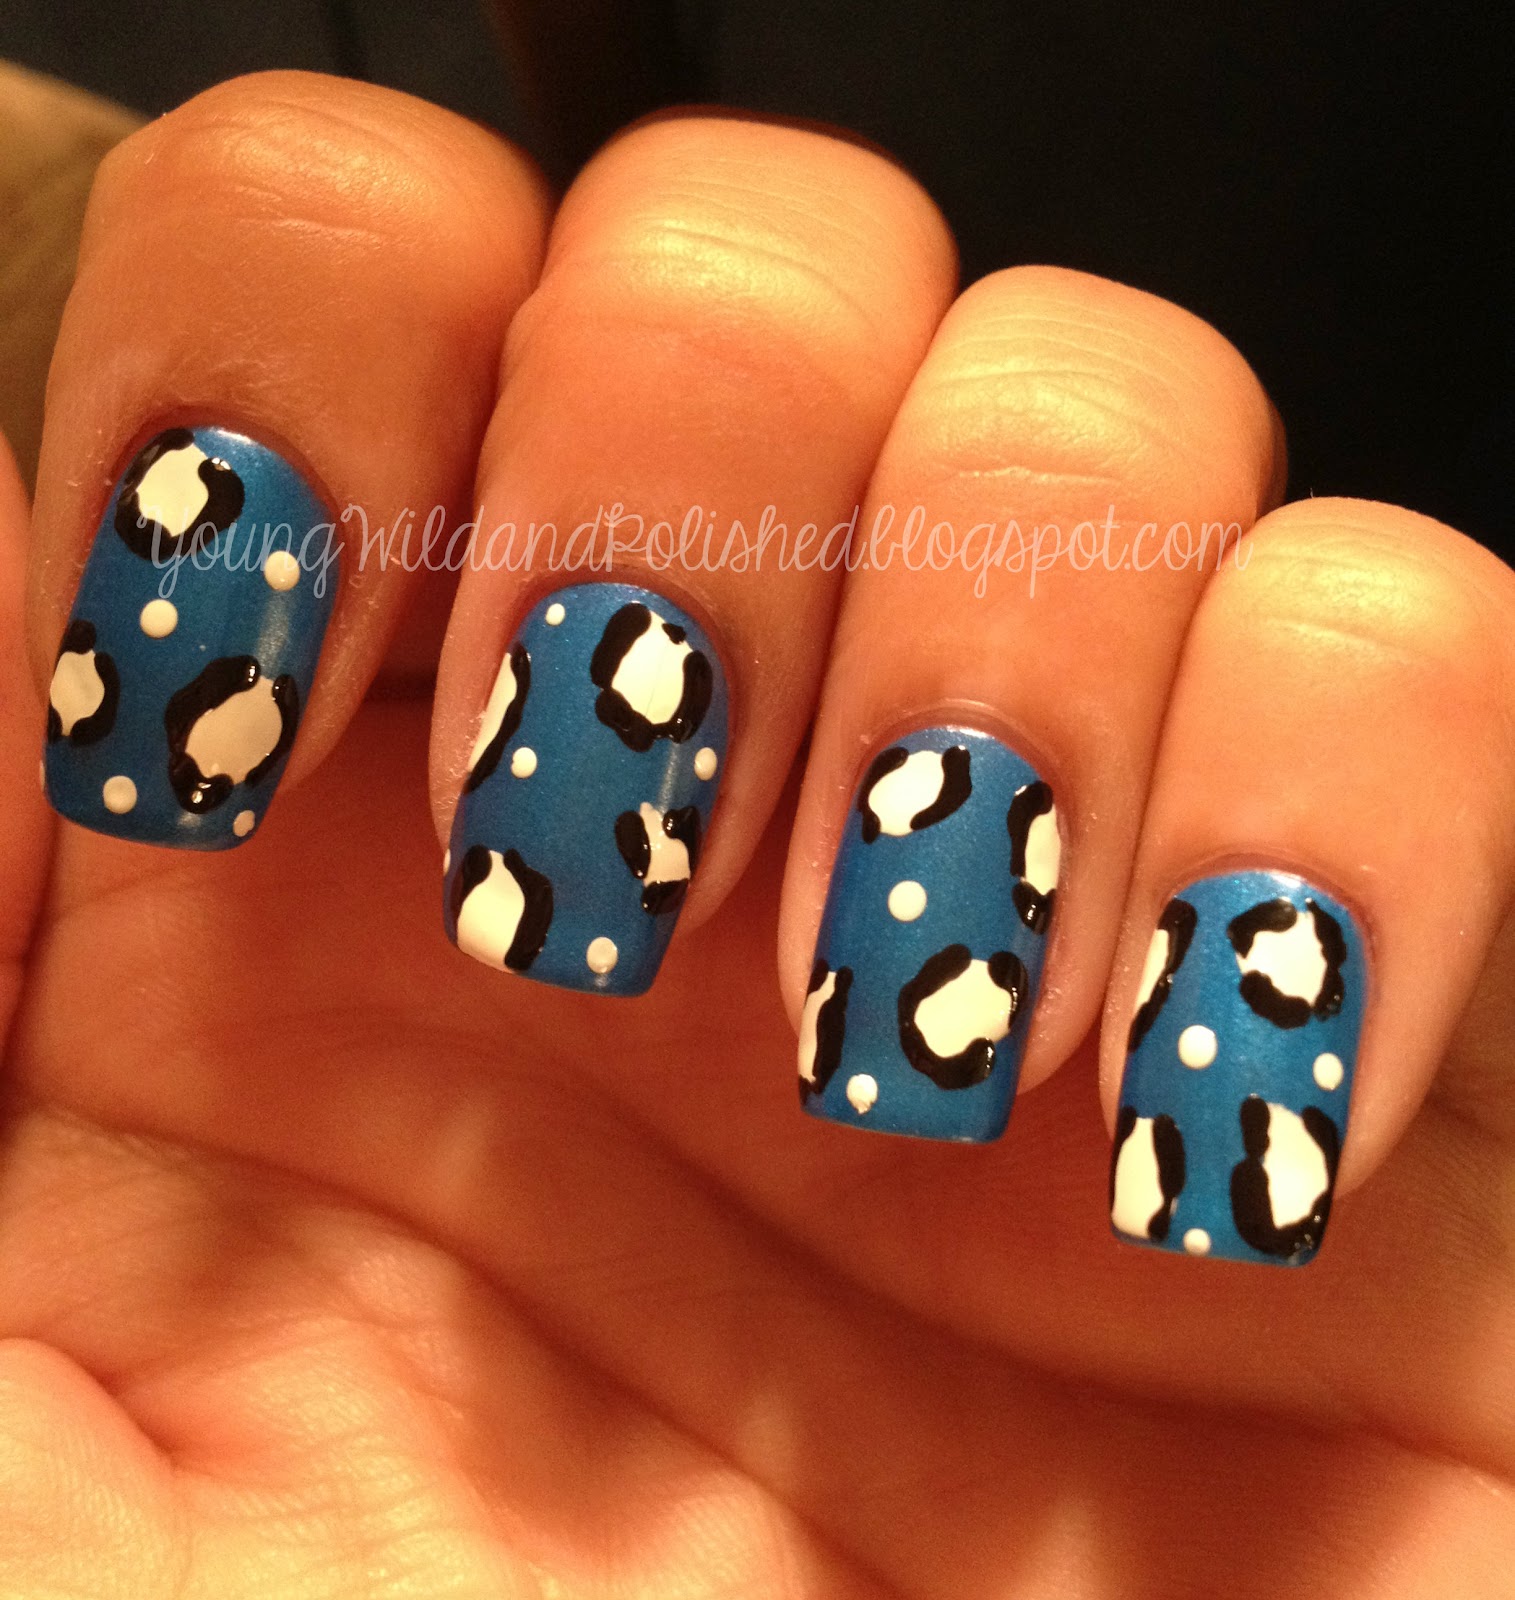
Ever have something not turn out nearly as good as you envisioned it in your head?  Yeah, welcome to my world.  I'm not really a huge fan of animal print, I mean I like it to wear in bits and pieces but whenever I imagine it on my nails, I picture Snooki and really long fan like nails.  That may look lovely on some people but it's certainly not my cup of tea.  But I had done a leopard print a while ago and it turned out really cute so I thought I'd give it another shot.  There was only one problem.....the spots were too big and we went from leopard to Bessie the cow faster than you can say moo....


Different sized pictures seems to be my thing, eh?


I'm not saying I don't like them, because I kind of do but I feel the insatiable urge to moo and have a little bite of grass whenever I look at them.  I think if I would have made the spots smaller like I did in the past I wouldn't feel so "cow-ie" (new word of the day) right now.  

I used China Glaze Splish Splash for my base color.  It's not exactly an untried, but I haven't used it in a while.  It is one of my favorite blue polishes.  The formula is not the best, it's a little spotty and requires 3 coats but the end result is very pretty!  The dots were made with Milani High Speed Fast Dry White on the Spot and Sinful Colors Black on Black.  If you haven't used this Sinful black, you should give it a try.  It really is a nice glossy black and the formula is pretty amazing for being an inexpensive drug store polish.  

I have seen some people do their outline first (the black part) and then fill in their color (the white part).  I do the opposite.  I find it easier to start by making your spots because you have a little more freedom to make them different shapes and not just straight up circles.  I just use the polish brush of whatever color I am using to make the spots.  Then I take my thinnest dotting tool, (you could use the end of a bobby pin), and I dip it into a little polish I have poured out and make my lines.  I try to leave some space in between to get the look not so uniform.  It's actually very simple.  This was a quick mani for me, I cannot get caught up with life so I apologize for not spending more time on this one.

Do you guys like this design?  I'm still on the fence with this one, maybe if I "moo" a little more it'll grow on me?!

Happy Polishing!


Tuesday, September 11, 2012

30 Day Challenge Day 11- Stripes *Sigh* And A Baby Tutorial

Hi kiddos, how is everyone doing today?  I'm ready to take my little heiney to bed but not before I get my post up for all you lacquer lovers to see.  I had a busy day today, got to reconnect with a friend I had lost contact with for a while. (Long story)  Let's just say it was a very good night!

Sooooo, stripes huh?  Yeah, not a fan!  I don't have striping tape and I don't want to play with stripes.  But the challenge was a way for me to spread my polished wings and venture into lands other than dots and water marbling.  So instead of glamouring you all into believing we had skipped over day 11 due to technical difficulties, I sucked it up and tried something new.  Originally I attempted zebra stripes but when the hubs asked me why I was scribbling on my nails, I chucked it and started over.  *Hides behind couch*  Oh ok, go ahead, have a look....


Why is your last picture so large Nicole you ask?  I have no clue...I redid it 3 times and the little mother sucker just wants to be large and in charge.  Of course I had to throw a few dots in...mainly because I jacked my middle finger up royally and didn't have it in me to redo it.  If you've never seen this design before, let me explain what I did.  Keep in mind, it's a major pain in the arse!

First I dripped about 4 or 5 large, and I mean schmongo (new word of the day) drops onto my little palette.  You could use a plate, tin foil, your husbands belly button, whatever floats your boat.  Then I sat there like a total loser and mixed the little effin puddle for what seemed like an hour (it was probably about 5 minutes) until it got gummy and started to make strings when I pulled on it.  I used my thinnest dotter to do the mixing.  I then got my nail as close as I could to said puddle and quickly but gently pulled up on my dotter bringing a string of gummy polish over my nail.  

As you can see, sometimes it didn't work as well as I had hoped.  Either the strings disappeared into thin air or they were a little too thick.  It's a cool process and really very simple but it is a little tricky to get your polish and pulling process just right.  With some practice, this could be really neat.  The trick is not to get too much polish on the dotter as you are pulling.  This is easier said than done.  Once the polish starts to thicken, it magically starts to disappear.  Your nice big puddle turns into a little spot of frustration.  I'm going to try this again and I'll take pics as I go.  It's a little difficult to explain without being able to show you kids some photos.  

You have to let this dry forever before top coating.  I didn't wait as long as I should have even though I thought I was ok.  We'll try again soon with a mini tutorial.  

My untried polish was Butter London Marrow, a deep purple with just a hint of shimmer.  Application was good, I did have a little dragging and spotting but the color is so pretty I didn't even care.  The pretty pinky purple polish I used was Zoya Perrie.  I love this polish.  It is very opaque and goes on great.  I used 2 coats of both polishes.  

Hope you guys aren't too disappointed with this one, stripes make me want to scream.  Can't we just get to water marbling already? :) 

Happy Polishing Friends!!

Check out the other lovely lacquer heads participating in the Polish Pit of Death, um, 30 Day Challenge.


Monday, September 10, 2012

30 Day Challenge Day 11--DOTS!!!

Ok, now you all know that Dot loves dots and I was so excited for this challenge day....well wouldn't you know it?  As soon as I put that dotter in my hand, I drew a big stinkin blank.  I was putting so much pressure on myself to do something amazing and off the wall that I got myself overwhelmed.  I swear nail blogging is a high stress kind of job!  FBI bomb squads? Brain surgeons? Pssshhhh, they ain't got nothin on nail bloggers!  But I pulled through.  Just as I was fading and starting to go toward the white light, I got my act together and threw down some dots that I hope you will be happy with.


I wanted to do something I had never done before...and this certainly is something new for me.  I really like the look of this.  It's fun but still classy.  My untried was Butter London Victoriana, one of my BOGO purchases just today from Ulta.  It really is so pretty!  Formula was good, it went on very opaque.  The above pictures are one coat, yes only one!  I love me some Butter London.  Ulta was like a madhouse earlier.  Women were crowded around the BL display as if they were giving away free samples at Costco on a Saturday afternoon.  I managed to throw some elbows and grab a few polishes. One lady had 10 polishes in her bag.  I swear she was just buying for the sake of buying.  Gotta love her dedication.  I think I even saw her out of the corner of my eye put a women with a walker in a choke hold.  (I could be exaggerating but you'll never know now will you?)  

The dots were done with No Place Like Chrome  from Essie's Chrome Collection.  You guys already know I am in love with this line, and this beauty worked just great for my dots.  

Did Dot pass the dot test?  I hope I made you all proud!!

Happy Polishing!

Take a gander at the other lovely ladies nailing it up in the Bungee Jumping While  Water Marbling Death Drop, ahem, I mean 30 Day Challenge.


30 Day Challenge Day 10-Gradient Nails

Hi loves, I feel like I have been rushing all day.  Ugh, don't you just hate days like that?  Woke up late, rushed to work.  Left work and rushed home to get this post done.  I wanted to do it last night but we all see how that turned out.  Hopefully it was worth the rush...

I am not a fan of gradient nails.  I love the look but I don't feel that I am too great at it.  It's so messy and I always end up messing something up and having to start over.  4 hours later I have a completed mani.  Sheesh, I'm tired just thinking about it!  But I managed to squeak one out (hehe) for you lacquer lovers.  I really like the way it turned out.  I wasn't too thrilled with the gradient so I covered it up (a little)....have a peek....


Yes?  Was it worth the rush home?  I used China Glaze For Audrey, a gorgeous tiffany blue polish that I use frequently.  My untried is Sally Hansen Insta Dry Lively Lilac.  Why have I not used this beauty before?  It is so pretty with the little bit of shimmer it has, and it was totally opaque after one coat.  I reversed my index fingers just for a little spice in my mani's life.  The topcoat I have on is Lush Lacquer Salt n Peppa.  If you don't own this piece of amazingness, you must get your pampered paws on a bottle.  It is one of my faves.  There are plenty of sister dupe's out there also.  I like this one because it has teeny tiny specks of white glitter that just dance (hip hop mostly) around on the nail.

Hope you guys like what I came up with for this one.  I certainly am glad gradient day is over.  And next up we have.....wait for it.....POLKA DOTS!!!!!!  Now you all know my new name is Dot, or Dotty, whatever tickles your turnips...I guess I will have to come up with something fab to keep with my name.  

Happy Polishing Friends!!!


Check out the other female wrestlers, bloggers and nail lovers participating in the Polish til you pass out, cuticle clipping championship, um I mean 30 Day Challenge.  Don't know what gets into me?! My sincerest apologies...