Showing posts with label Tutorial. Show all posts

Wednesday, August 8, 2012

Flower Tutorial, and a Sidecar of Insanity.

 So I was all ready to post my perfectly acceptable tutorial, and I bumped the Delete button and that was that. After having a meltdown, I am going to try this again. The tears have passed and I'm putting on my big girl panties and hoping for the best.

So last night I tweeted a pic that I was going to blog about. If you didn't see it, it was a baby pink base with different colored flowers. Well life happened (yet again, can you say sucky luck) and I jacked the entire manicure up by saving my 10 year old from falling flat on her clumsy little face. Needless to say I was not in the mood to sit and spend another hour on my nails so I tried again today. The colors are different but hopefully you guys will like it. I think today's mani is actually a little bit better.


I used Revlon Colorstay Coastal Surf as my base color. It is a gorgeous crisp opaque sky blue. It could be a one coater but I like to do 2 no matter what. For the flowers I used my go to white, China Glaze White on White. The center dots are OPI Pink Flamenco, Orly Spark (yellow), and OPI Do You Lilac It?


HOW TO DO THE FLOWERS:

  • I always start at the top of the flower. So depending on where you want your flower to be that is where you will start your dot. Make one dot and to the right of it, down a little bit, make another so that they are very close together.


  • Next you are going to go back up to your first dot, move to the left this time, down a bit just like we did before and make your 3rd dot. It should look like a triangle without the bottom.


  • Now you are going to make your 2 little "legs" at the bottom. You want to make sure that you make them in toward the center of the flower a bit. This is what helps make the petal shape.
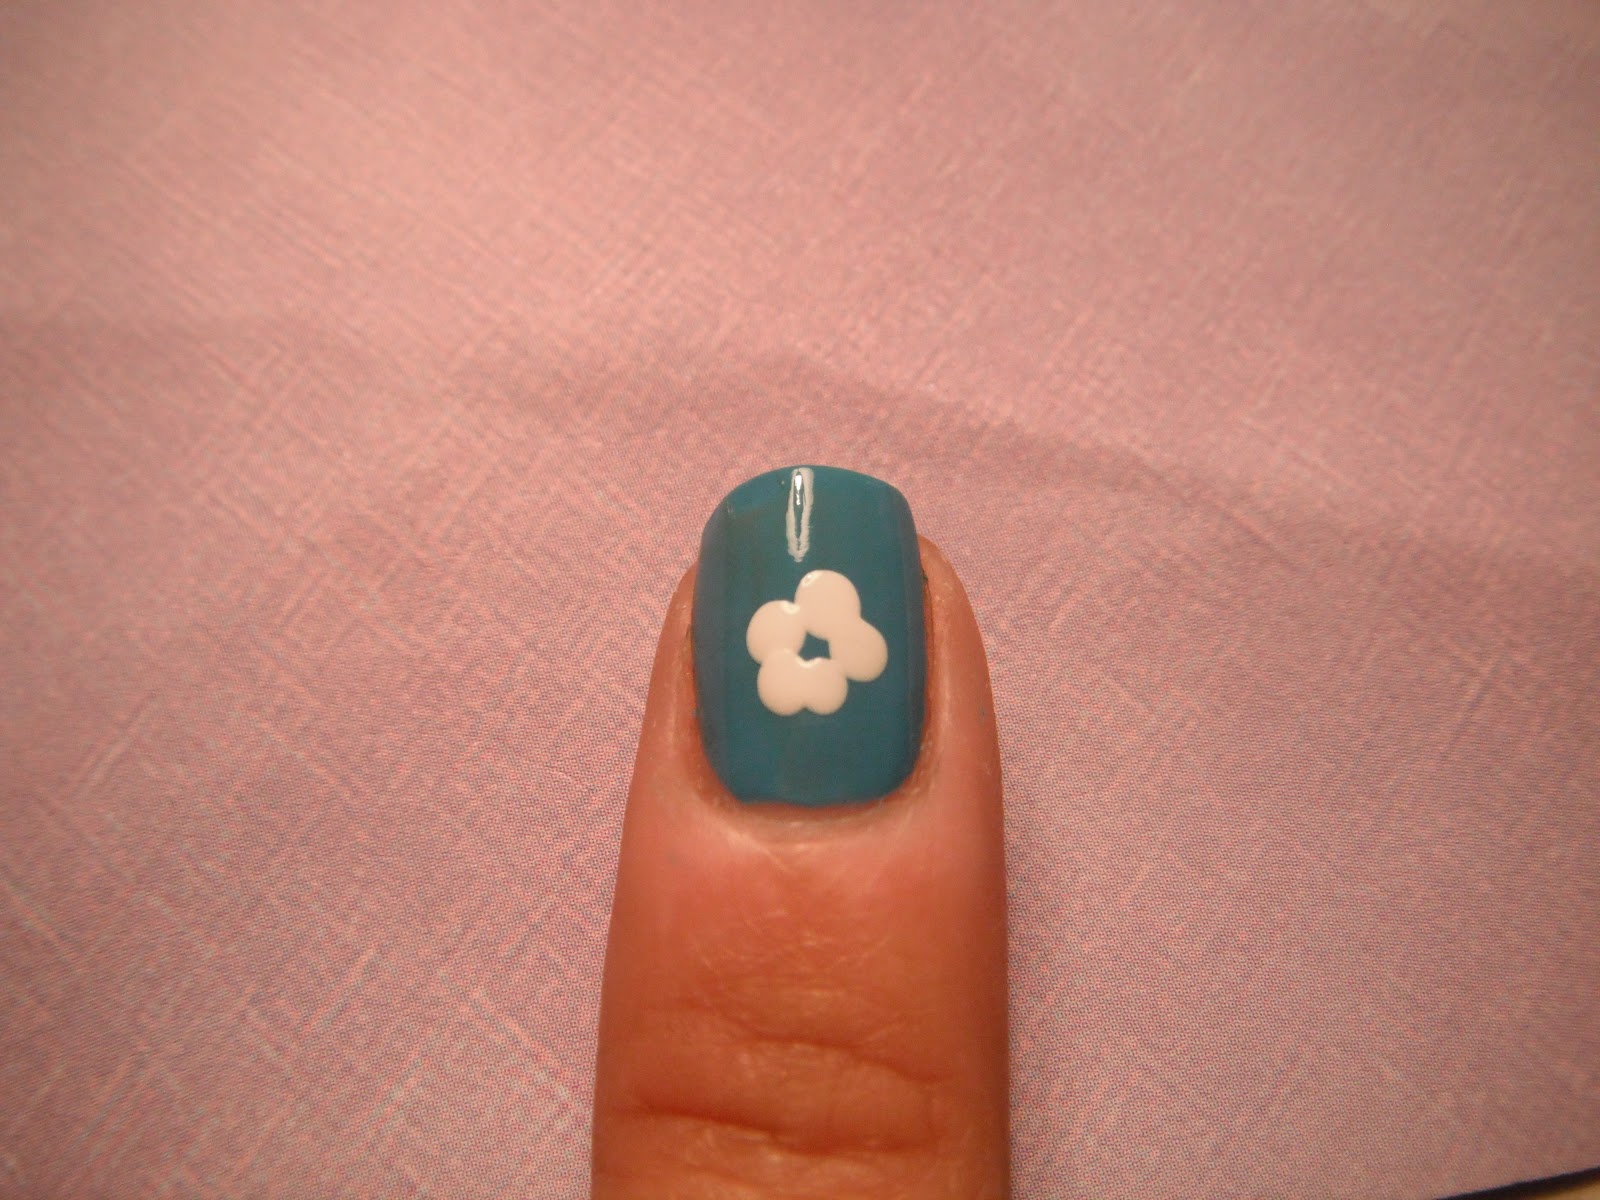

  • Make a small white dot in the center and let dry. I also like to make flowers along the edges, you will do this the same way but instead of making an entire flower you only make part of it depending on where you are doing this on the nail.

Here you can see how I made 3 little dots and a center to create this look.


  • Once dry you can put your colored centers in. Take the color of your choice and make one dot in the center of the big flower and where the center would be on your "edge flowers". I like to use a smaller dotter to do the center dot but that is just personal preference. If you are using a bobby pin, it will look just as lovely if you make it the same size as your other dots. 

  • Add a few dots around the nail to fill up some space, apply a topcoat after letting everything dry for a minute or two and you are done!!
Look, my nails match my hubby's shirt....how sweet!


Totally painless right? (Just keep the Delete button away from me).  I hope this helped and maybe encouraged some of you to dip your perfectly polished tootsies in the nail art pool!

Happy polishing loves!!!


Tuesday, August 7, 2012

Dry Marble Tutorial

Hello loves, how is everyone today?  It's a beautiful day here in PA so I can't complain. I am getting tired of the same old nail art so I decided to try something I have never done before. Now I am an old hat at water marbling, I have probably done over 200 different combinations, and while it is gorgeous, it is getting a little "blah" for me. But dry marbling? What is this I hear of? And why haven't I ever tried it? Well alas, it is pretty darn simple to do for all you water marble haters out there. It is a bitch, believe you me, there are days I want to break a bottle (liquor not nail polish,  I'm going for the beat down) over the head of the person who invented it. And it is much, much cleaner. You won't have polish covering 90% of your hand when you are done. (but if you do, I can't be held accountable). 


Ok, on to the pics then I'll tell you how I did it....


Colors used:  Essie Licorice
                                     Sally Hansen Lacey Lilac


Pretty cool right? And I promise it is not hard.  Here's what I did. 


  1. Paint your nails with your base color. It is supposed to be thick, but putting it on thick from the get go was not working for me so I did a very thin coat on all of my nails and cleaned up my cuticle area with a brush and some acetone. 
  2. Once that was dry, I went ahead and did a second pretty thick coat on one nail. Immediately after putting that 2nd coat on, I grabbed my lighter color (lavender in my case) and put a few dots on top of the nail, not too thick not too thin. It should be enough to spread out a little bit but not too much that it runs off the nail. 
  3. Using a safety pin or a toothpick ( I like to use a toothpick), GENTLY swirl the dots that you just made with the base color.  If you do this too hard, you will have lines on the nail with no polish. I found that the less I swirled, the better it turned out. A few swipes will do you just fine.
  4. Repeat these steps, doing each nail individually. The polish has to be very wet for it to spread correctly so you have to move quickly. 
  5. Use a nice thick top coat to blend everything together. A few of my nails didn't look too great but once I applied topcoat, it was like magic. Everything came together just perfectly.
  6. I did find that using a dark color as the base and a lighter color for the "swirls" worked really nicely. 2 bright colors didn't have as much "POP". Using a light base and a dark 2nd color also looks really pretty.
  7. Don't get discouraged....I think I did my ring finger on my right hand 5 times. (I did both hands and kept this on as a mani, thats how much I loved it).  Every nail is not going to turn out the way you want the first time, at least mine didn't. Don't give up, nail polish is finicky, it will happen.
This is a really cool alternative to water marbling with a similiar effect. I think I actually like the finished look of this better. 

Of course I did not create this design or concept. I am simply showing you my way of doing it with some tips that I hope will help you. If anyone knows the creator of this, please let me know so I can give credit where credit is due. 


Last but not least, I promised my little guy Nicholas (everyone wave hi) that I would post a picture showing the beautiful necklace he got for me with his own money. He used up all of his savings to get this for me (which wasn't much, bless his little heart).....he really is the sweetest little guy.  Have a look at momma's bling!!


There you have it kids...my version of the dry marble and a little bling bling to close things out.


Send me pics of your dry marble, I would love to see the different color combo's everyone uses.

Monday, July 30, 2012

Super Simple Water Color Nails...Tutorial anyone?

Hi kids, hope everyone is having a good start to the work week. I'm still off work recuperating from a minor surgery last week. Can you say "bored out of my mind"? I'm not one to sit home and do nothing, but at least I am getting lots of swatches and nail art done.

So today I have a seriously easy water color design. It is so pretty on the nail and looks like it would be very tricky, but let me tell ya, this little lady is super simple.I've seen this done on the web a bunch of different ways, it is certainly not my creation.  Have a peek and then I'll tell you how I did mine....


In real life, it was a little brighter but of course, the professional photographer in me was away on vacation.  This pic below is a little more true to color, excuse the classifieds in the background. 


WHAT YOU WILL NEED:

A medium sized paint brush
Pure Acetone
2-6 bottles of nail polish
A light colored polish for your base, I used white
Good quality topcoat
Sparkly Topcoat (Optional)


Ok, so first I just put on 2 coats of white polish (China Glaze White on White).  You could use something other than white if you wanted to. I have used OPI Skull and Glossbones in the past....a light color is what you want. Tan, light gray, whatever floats your boat. So after you do 2 coats, put on a nice thick coat of your favorite topcoat. (Seche Vite works really well for this, I would highly suggest it).  This is a very important step that you cannot skip. The thick topcoat is what keeps your base coat on and allows you to spread the polish without taking all of it off.

Pick out anywhere from 2 to 6 colors of polish. Technically you could use more but I usually stick with 5 or 6 tops. After that, it will start to get jumbled and take away from the simpleness of this design.  For this I used Essie Play Date, Sally Hansen Mellow Yellow, Zoya Shelby, Essie Turquoise and Caicos, and Essie Lapiz of Luxury. Keep in mind that you are diluting the polishes with acetone so choose wisely. I used muted colors and a few bright ones for this and it worked well. Depends on the look you are going for. Just a little something to keep in mind.

Take your first polish and make a few smalls dots on the nail. I usually make 3, any shape is fine. When I first tried this I made them thick, but I have found that more isn't always better. Make sure you get most of the excess polish off of the brush before you dot. 


This is the brush that I use....just to give you an idea. You can see the size in comparison to my somewhat painted and very bloated finger. Wow, check that monster out!


Dip your paint brush into the acetone and remove the excess. You want the brush wet but not dripping. I dip my brush and then blot it 3-4 times on a newspaper or paper towel. 

Quickly spread out the dots that you made on your nail by using short quick motions. If you feel like the polish is starting to pull, get a little bit more acetone on the brush so you don't destroy your base coat. You can always add more dots if you feel the color isn't bright enough. It's pretty much fool proof. The only thing you really have to be careful of is destroying your base coat. Work with a light hand and move around constantly. Staying in one stop will remove all of your color and take off your base coat, leaving you with a bare spot on your nail. Been there done that). Once you're done you will get something that resembles this....


Continue this for all of your colors, allowing a minute or two between colors for the acetone and polish to dry a bit. If you find spots that are still white from your base coat simply put a little dot of polish (whichever color you prefer) and repeat the method. Make sure you don't forget about the edges of your nails. Take the design the whole way to the ends so you don't end up with a beautiful design in the middle and white edges (which I have done more than once).

You can leave the design like this which looks perfectly lovely, or you can do what I do and top it with a sparkly topcoat. I usually use Northern Lights or China Glaze Fairy Dust.  For this one I used Fairy Dust. Top with a little Seche Vite or your favorite top coat and you are good to go. See?! How painless was that? 

As I mentioned earlier there are a few different methods for doing this on the net, I certainly am not trying to take credit for thinking this up. I don't know who to give credit to for this little gem but if anyone else does, please let me know so I can give credit where it is due. 

I'd love to see your different color combo's. Send me a pic on my facebook page if you decide to give this a try!  Hope you guys enjoyed!!