Showing posts with label Dry Marble. Show all posts

Wednesday, August 21, 2013

Striping Tape Mania....and a Beautiful Bargain!

Hello friendships, hope you're all doing well, smacking mama's and such. I am doing great, especially after the little polish gem I found a few days ago....don't fret, you're getting in on the action right now!!

The 2 mani's I'm going to share started with one little polish that cost me a whopping dollar! I fell in love with the baby from the second I saw it sitting in Kmart all alone, just waiting to be taken home and loved.

Violence in a bottle!

It's so gorgeous, I just want to slap a newborn! This, my friends, is Wet n Wild Teal Slowly and See.... possibly the best bright blue polish I own....did I mention this cost as much as a Mcdonald's Double Cheeseburger? 

The color is divine, I suddenly have the urge to pack up my super uncool tankini and head to the Caribbean! But....the formula is also perfect! Opaque in 2 coats, no streaking, no patchiness, just smooth buttery goodness!

This little lady is limited edition so get your pants on and get rollin. The Wet n Wild Pop Art Collection won't be around forever....you can bet the farm I'm stock piling this beauty!

This little vixen inspired 2 fun manicures....


It's been awhile since I've done a kitchen sink mani...everything but the kitchen sink...and I certainly satisfied my urge with this design!

My index and middle finger are just 2 different designs I made while playing around with the striping tape. Both had the pleasure of wearing Teal Slowly and See...on my index finger I started with a base of Sally Hansen Mint Sorbet and on my middle finger the base was Essie Blanc. My ring finger is a gradient of TSAS and Mint Sorbet. I topped it off with INM Northern Lights, a really pretty and subtle glitter topper. 

My pinky finger is one of my favorite silver glitters, OPI Crown Me Already, a beautiful micro glitter with larger glittery pieces throughout. The formula is awesome, 2 coats and she's totes opaque...and oh so mama slappin shimmery! 

Everything got a good smearing of Seche Vite and I was on to the next.

The next little number is another fun one....
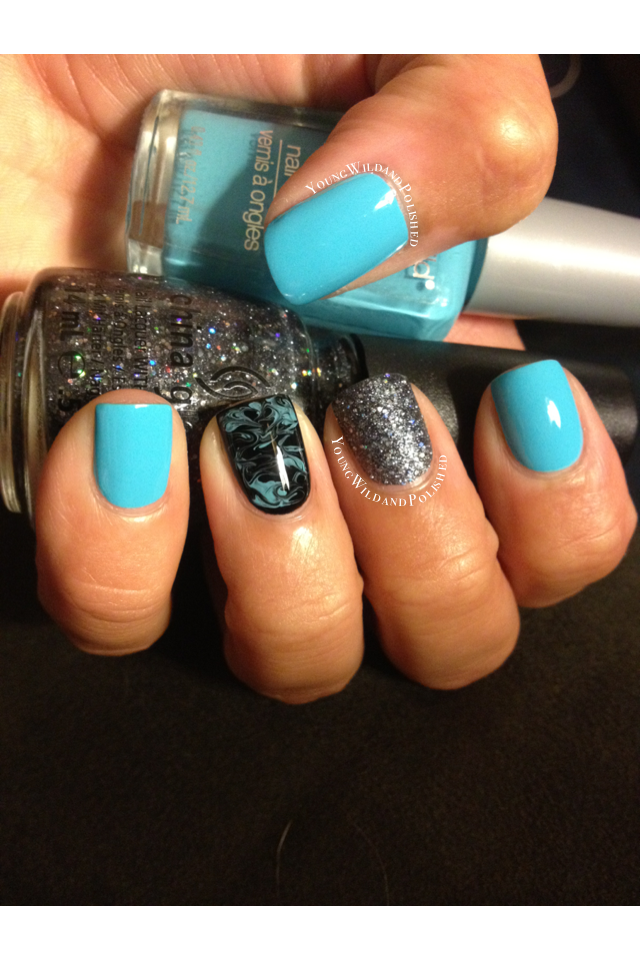

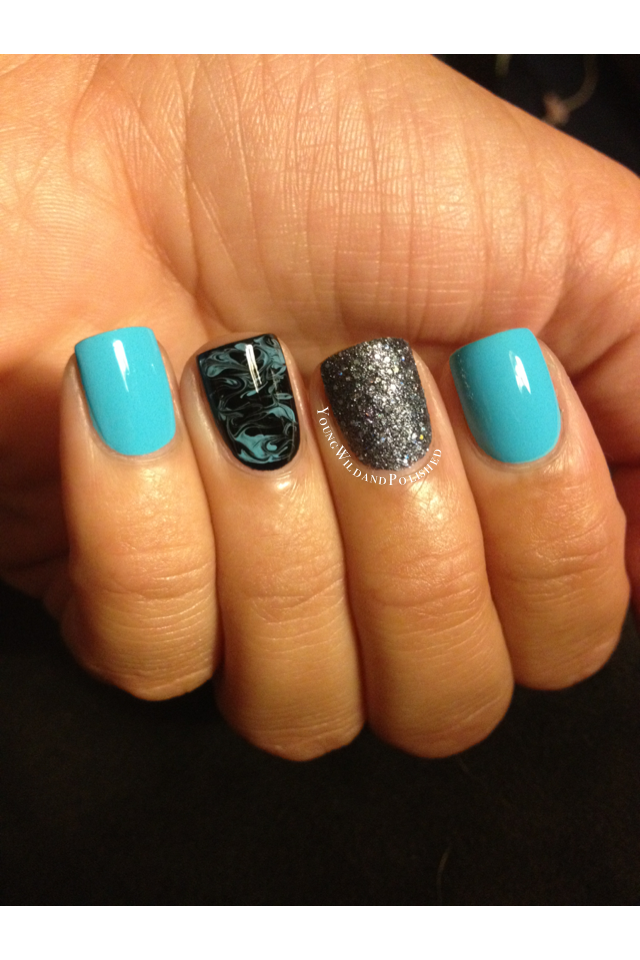
Yep there's that blue beauty again!! And I had to add a little sass to it, you know me! Although this polish is so gorgeous, I'm just fine with wearing it alone!

On my middle finger, I layered on 2 coats of China Glaze Some Like It Haute, a beautiful black based glitter polish with silver flecks scattered all about.  I forgot how gorgeous this was...so glad I dusted her off and gave her some work! My ring finger is what I refer to as a "dry marble". It's extremely easy to do...simply put on your base color...a bit thicker than you normally would (black in this case) then immediately put droplets of another color (Teal Slowly) on your nail and swirl with a toothpick. It really is a simple design to do, the main part is getting the droplets blended while your base color is still nice and wet.

This is one of those designs that even if you mess up a bit, it still looks super cool....the dry marble is so forgiving!!

I've definitely found my polish obsession of the month! I could wear this polish everyday and be perfectly content (at least for a week or two, come on...this nail whore can only take so much)!!

What is your most recent polish obsession? When is the last time you had to slap someone over a gorgeous polish....think carefully, don't disappoint me...

Happy Polishing my loves!!

Tuesday, August 7, 2012

Dry Marble Tutorial

Hello loves, how is everyone today?  It's a beautiful day here in PA so I can't complain. I am getting tired of the same old nail art so I decided to try something I have never done before. Now I am an old hat at water marbling, I have probably done over 200 different combinations, and while it is gorgeous, it is getting a little "blah" for me. But dry marbling? What is this I hear of? And why haven't I ever tried it? Well alas, it is pretty darn simple to do for all you water marble haters out there. It is a bitch, believe you me, there are days I want to break a bottle (liquor not nail polish,  I'm going for the beat down) over the head of the person who invented it. And it is much, much cleaner. You won't have polish covering 90% of your hand when you are done. (but if you do, I can't be held accountable). 


Ok, on to the pics then I'll tell you how I did it....


Colors used:  Essie Licorice
                                     Sally Hansen Lacey Lilac


Pretty cool right? And I promise it is not hard.  Here's what I did. 


  1. Paint your nails with your base color. It is supposed to be thick, but putting it on thick from the get go was not working for me so I did a very thin coat on all of my nails and cleaned up my cuticle area with a brush and some acetone. 
  2. Once that was dry, I went ahead and did a second pretty thick coat on one nail. Immediately after putting that 2nd coat on, I grabbed my lighter color (lavender in my case) and put a few dots on top of the nail, not too thick not too thin. It should be enough to spread out a little bit but not too much that it runs off the nail. 
  3. Using a safety pin or a toothpick ( I like to use a toothpick), GENTLY swirl the dots that you just made with the base color.  If you do this too hard, you will have lines on the nail with no polish. I found that the less I swirled, the better it turned out. A few swipes will do you just fine.
  4. Repeat these steps, doing each nail individually. The polish has to be very wet for it to spread correctly so you have to move quickly. 
  5. Use a nice thick top coat to blend everything together. A few of my nails didn't look too great but once I applied topcoat, it was like magic. Everything came together just perfectly.
  6. I did find that using a dark color as the base and a lighter color for the "swirls" worked really nicely. 2 bright colors didn't have as much "POP". Using a light base and a dark 2nd color also looks really pretty.
  7. Don't get discouraged....I think I did my ring finger on my right hand 5 times. (I did both hands and kept this on as a mani, thats how much I loved it).  Every nail is not going to turn out the way you want the first time, at least mine didn't. Don't give up, nail polish is finicky, it will happen.
This is a really cool alternative to water marbling with a similiar effect. I think I actually like the finished look of this better. 

Of course I did not create this design or concept. I am simply showing you my way of doing it with some tips that I hope will help you. If anyone knows the creator of this, please let me know so I can give credit where credit is due. 


Last but not least, I promised my little guy Nicholas (everyone wave hi) that I would post a picture showing the beautiful necklace he got for me with his own money. He used up all of his savings to get this for me (which wasn't much, bless his little heart).....he really is the sweetest little guy.  Have a look at momma's bling!!


There you have it kids...my version of the dry marble and a little bling bling to close things out.


Send me pics of your dry marble, I would love to see the different color combo's everyone uses.