So last night I tweeted a pic that I was going to blog about. If you didn't see it, it was a baby pink base with different colored flowers. Well life happened (yet again, can you say sucky luck) and I jacked the entire manicure up by saving my 10 year old from falling flat on her clumsy little face. Needless to say I was not in the mood to sit and spend another hour on my nails so I tried again today. The colors are different but hopefully you guys will like it. I think today's mani is actually a little bit better.


I used Revlon Colorstay Coastal Surf as my base color. It is a gorgeous crisp opaque sky blue. It could be a one coater but I like to do 2 no matter what. For the flowers I used my go to white, China Glaze White on White. The center dots are OPI Pink Flamenco, Orly Spark (yellow), and OPI Do You Lilac It?
HOW TO DO THE FLOWERS:
- I always start at the top of the flower. So depending on where you want your flower to be that is where you will start your dot. Make one dot and to the right of it, down a little bit, make another so that they are very close together.

- Next you are going to go back up to your first dot, move to the left this time, down a bit just like we did before and make your 3rd dot. It should look like a triangle without the bottom.

- Now you are going to make your 2 little "legs" at the bottom. You want to make sure that you make them in toward the center of the flower a bit. This is what helps make the petal shape.
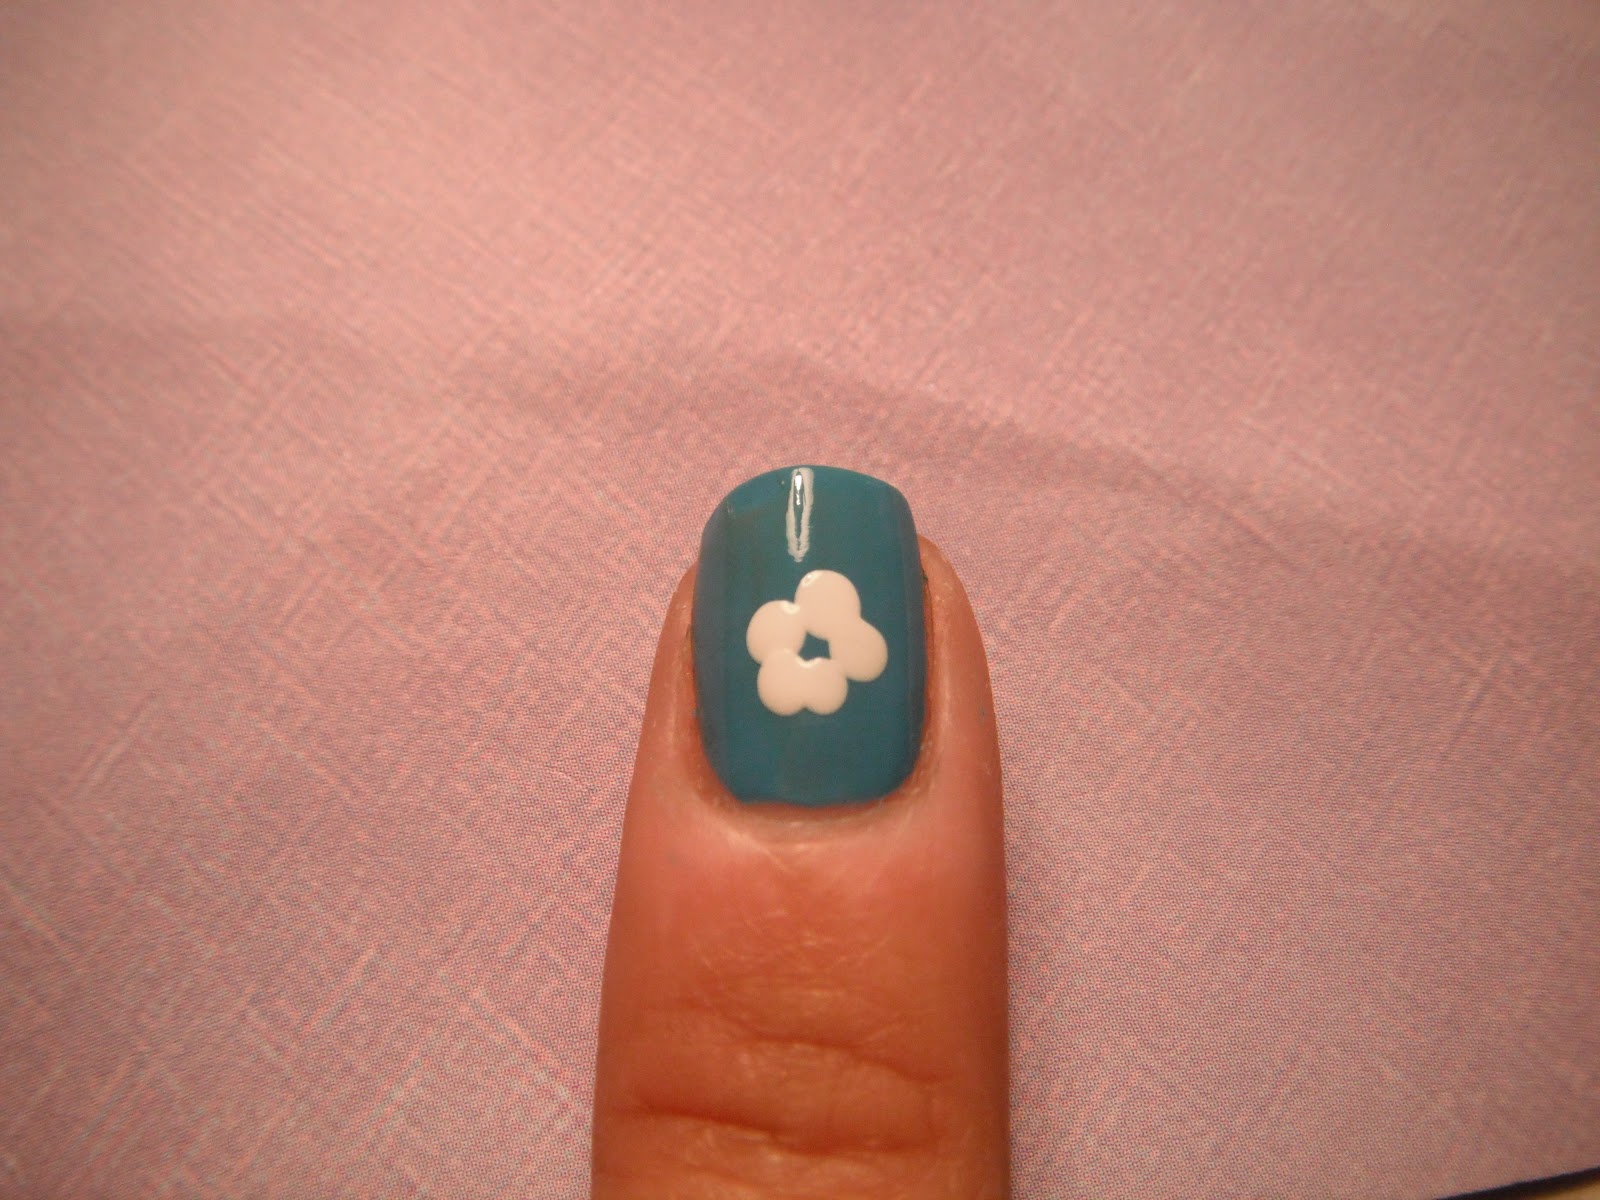
- Make a small white dot in the center and let dry. I also like to make flowers along the edges, you will do this the same way but instead of making an entire flower you only make part of it depending on where you are doing this on the nail.

Here you can see how I made 3 little dots and a center to create this look.
- Once dry you can put your colored centers in. Take the color of your choice and make one dot in the center of the big flower and where the center would be on your "edge flowers". I like to use a smaller dotter to do the center dot but that is just personal preference. If you are using a bobby pin, it will look just as lovely if you make it the same size as your other dots.
- Add a few dots around the nail to fill up some space, apply a topcoat after letting everything dry for a minute or two and you are done!!

Look, my nails match my hubby's shirt....how sweet!
Totally painless right? (Just keep the Delete button away from me). I hope this helped and maybe encouraged some of you to dip your perfectly polished tootsies in the nail art pool!
Happy polishing loves!!!
That mani is super cute! I love the colours :)
ReplyDeleteThanks love!!
ReplyDeleteVery cute and neat! And lovely of you to include a tutorial too!
ReplyDeleteI think this is very cute and seems fairly simple. Any time I say that something looks simple, I try to do it and mess it up royally. lol You did a great job on this.
ReplyDeleteThanks so much everyone. It really is easy. I promise. Give it a try Cynthia. I have faith in u friend!!
ReplyDelete