Showing posts with label Revlon Colorstay. Show all posts

Saturday, August 11, 2012

Cotton Candy Water Marble

Hi polish fanatics, hope you guys are all having a fun weekend! It is gorgeous here in PA, too bad I am stuck in the house doing my spreadsheet of all my polishes. I'd much rather be doing nail art.

So I've had a few people ask me for tips on water marbling. Seems ,that a lot of you are having trouble with water temp and polishes not spreading. I've decided to do a video tutorial that will help with some of your questions. I hope to have it posted by Monday so keep your eyes open. I am not an expert on water marbling, trust me, I still have problems with bubbling polish, water being too hot or cold etc. But if I can help even one person out there then the video will be time well spent.

Back to the nails. For this water marble I used Revlon Colorstay Coastal Surf and Sally Hansen Pretty in Hot Pink. These are definitely not polishes you want to use for your first marble. The Revlon did not want to spread and dried very quickly. But I trudged ahead, knowing that if I cursed enough and yelled at the polish bottles, eventually they would get scared and cooperate. And cooperate they did. The marble turned out pretty nice. Too bad my camera is a moody girl. She was not interested in playing in the least. So these pics are all from my cell phone. I normally would not use cell phone photos unless I had to and believe me, I had to. So go easy on me please....


I know they aren't the greatest, but you get the idea. The marble turned out pretty good, no? For as finicky as the polishes were being, I was pretty darn thrilled with the final results. Sally Hansen Pretty in Hot Pink is one of their newer polishes and it is be-a-utiful. It has the look of a neon without  the matte finish when dry.  I can't wait to try this on my toes! There is a little tip wear....maybe that will teach me to take my photos right away instead of waiting until the next day.


This nail was my favorite, the ring finger on my elusive right hand. 


I just love the swirl on this one!


Not bad for a quick water marble. Hope you guys enjoyed (even though the pics aren't the greatest). If anyone has questions please leave a comment on this post and I will answer them in the tutorial. 

Happy Polishing friends!!! Check back for my video tutorial!!


Wednesday, August 8, 2012

Flower Tutorial, and a Sidecar of Insanity.

 So I was all ready to post my perfectly acceptable tutorial, and I bumped the Delete button and that was that. After having a meltdown, I am going to try this again. The tears have passed and I'm putting on my big girl panties and hoping for the best.

So last night I tweeted a pic that I was going to blog about. If you didn't see it, it was a baby pink base with different colored flowers. Well life happened (yet again, can you say sucky luck) and I jacked the entire manicure up by saving my 10 year old from falling flat on her clumsy little face. Needless to say I was not in the mood to sit and spend another hour on my nails so I tried again today. The colors are different but hopefully you guys will like it. I think today's mani is actually a little bit better.


I used Revlon Colorstay Coastal Surf as my base color. It is a gorgeous crisp opaque sky blue. It could be a one coater but I like to do 2 no matter what. For the flowers I used my go to white, China Glaze White on White. The center dots are OPI Pink Flamenco, Orly Spark (yellow), and OPI Do You Lilac It?


HOW TO DO THE FLOWERS:

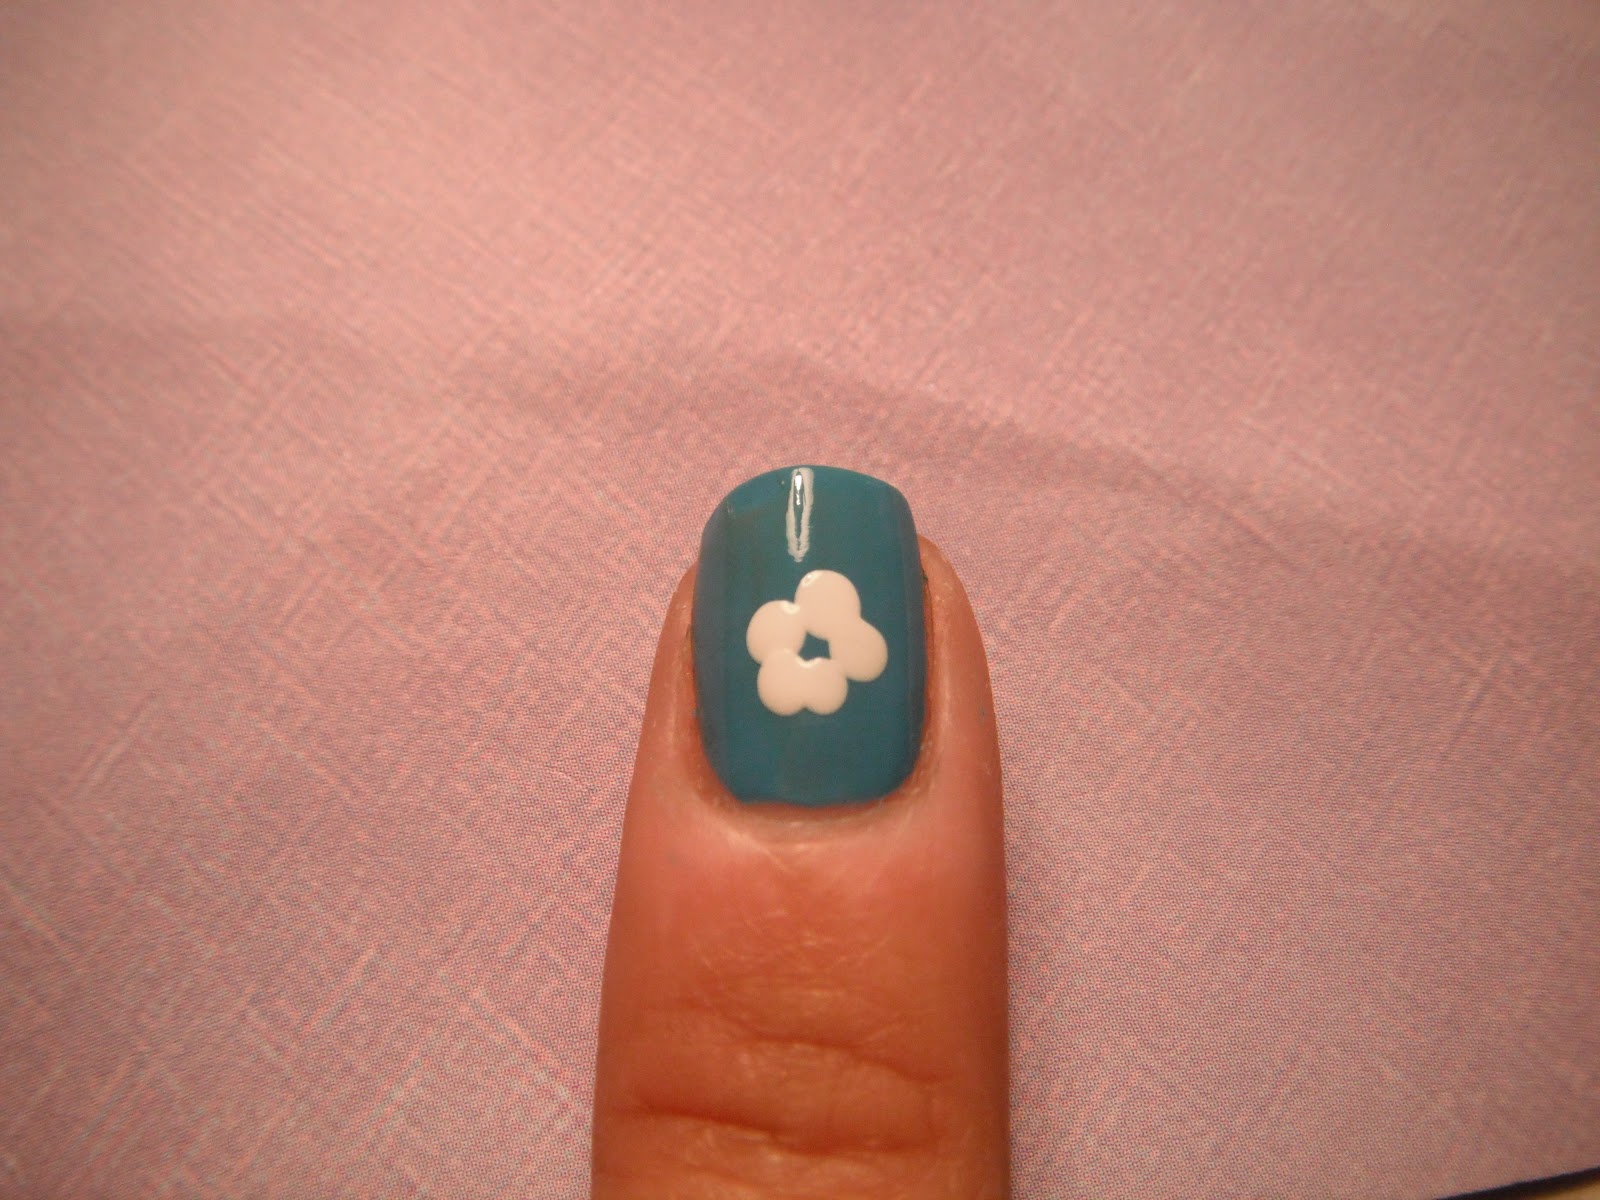
  • I always start at the top of the flower. So depending on where you want your flower to be that is where you will start your dot. Make one dot and to the right of it, down a little bit, make another so that they are very close together.


  • Next you are going to go back up to your first dot, move to the left this time, down a bit just like we did before and make your 3rd dot. It should look like a triangle without the bottom.


  • Now you are going to make your 2 little "legs" at the bottom. You want to make sure that you make them in toward the center of the flower a bit. This is what helps make the petal shape.


  • Make a small white dot in the center and let dry. I also like to make flowers along the edges, you will do this the same way but instead of making an entire flower you only make part of it depending on where you are doing this on the nail.

Here you can see how I made 3 little dots and a center to create this look.


  • Once dry you can put your colored centers in. Take the color of your choice and make one dot in the center of the big flower and where the center would be on your "edge flowers". I like to use a smaller dotter to do the center dot but that is just personal preference. If you are using a bobby pin, it will look just as lovely if you make it the same size as your other dots. 

  • Add a few dots around the nail to fill up some space, apply a topcoat after letting everything dry for a minute or two and you are done!!
Look, my nails match my hubby's shirt....how sweet!


Totally painless right? (Just keep the Delete button away from me).  I hope this helped and maybe encouraged some of you to dip your perfectly polished tootsies in the nail art pool!

Happy polishing loves!!!